Appearance
Data User Guide
Template
Download the upload template, which includes field names and data type requirements. Prepare your data according to the specified format before uploading.
Note: Keep all content in the template. Data rows must start from the third row.
Upload
Batch import data into the system.
Note: Only CSV format is supported.
Please use UTF-8 encoded CSV files.
To avoid data misalignment issues, open the CSV file in Notepad, move any unquoted fields to the last column, save the file, and then upload.


Four import modes are available:
1. Overwrite
Full replacement: deletes all existing data before importing new data.
2. Append
Keeps existing data and adds new records from the uploaded file.
3. Modify
Batch update: the uploaded file must include the primary key id.
4. Delete
Batch delete: the uploaded file must include the primary key id.
Download
Downloads all data in full.
+NEW
Create a single record via the NEW button using one of two methods: manual entry or file upload with auto-recognition.
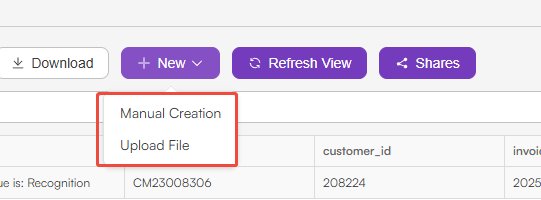
Manual Creation
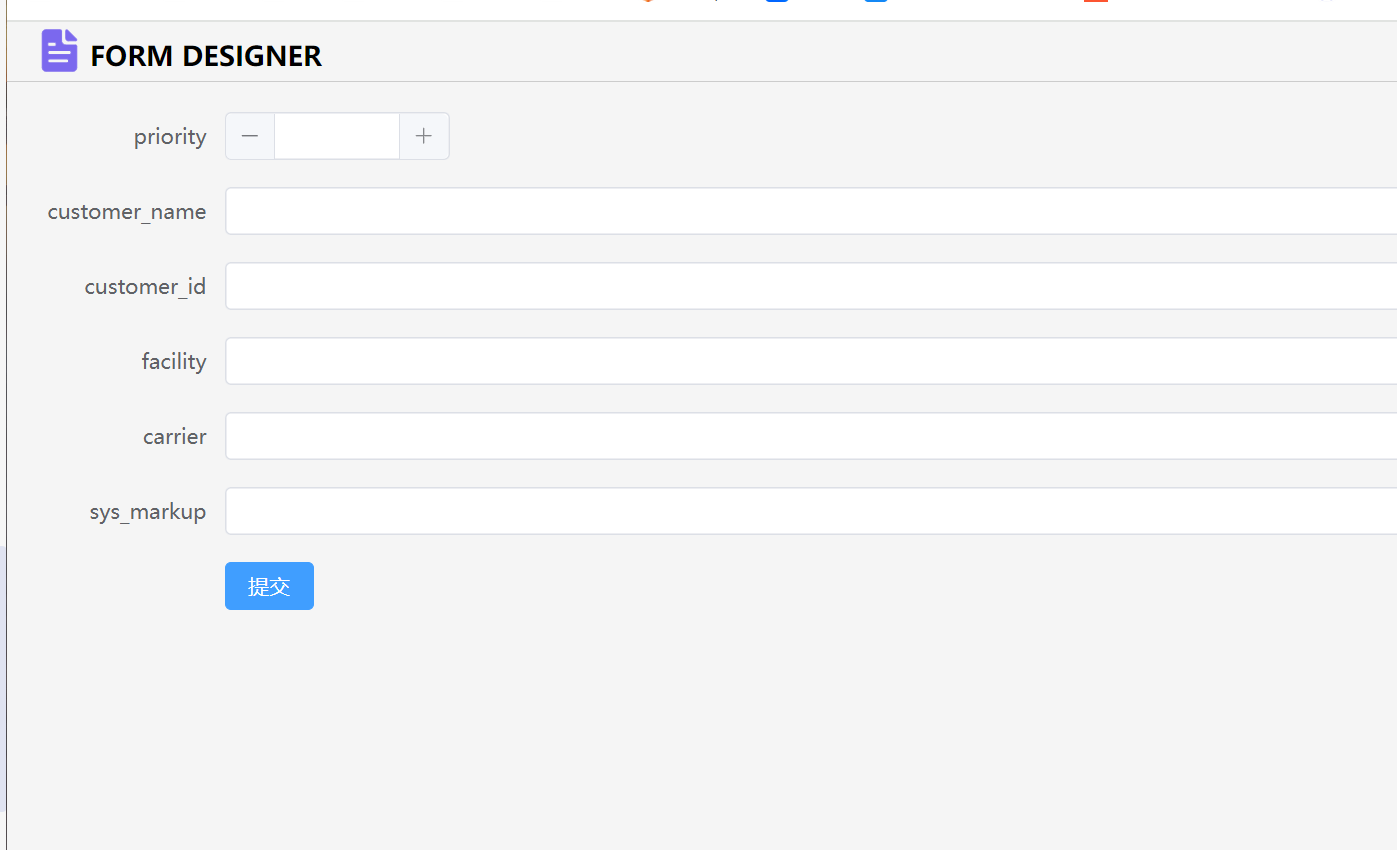
Manually enter a single record. Suitable for structured data entry scenarios.
Steps
- Click the NEW button to open the creation page.
- Fill in the required data fields.
- Submit the form to create the record.
Auto-generated Fields (Read-only)
The following fields are generated automatically and cannot be edited:
- id
- createby
- createtime
- lastupdateby
- lastupdatetime
Upload File
Upload a file to automatically recognize and generate structured data. Suitable for automated entry of documents such as invoices.
Description
- Permission check: Only users with the current group's permission can upload files.
- Supported file types: Images, PDF.
- Recognition logic: The system automatically performs OCR or content recognition on the uploaded file.
- View results: After recognition, click Edit to review results. The interface includes:
- Left side: file preview
- Right side: recognized data
Upload Example
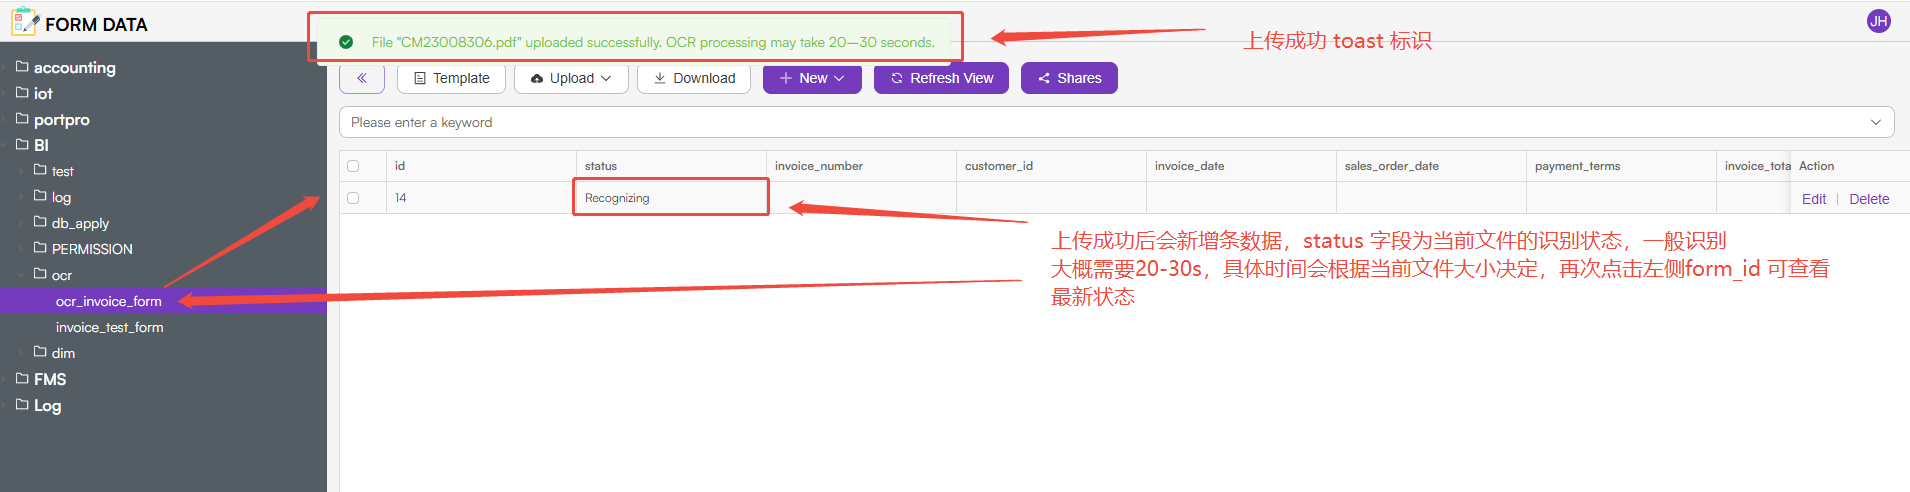
Recognition Result Example
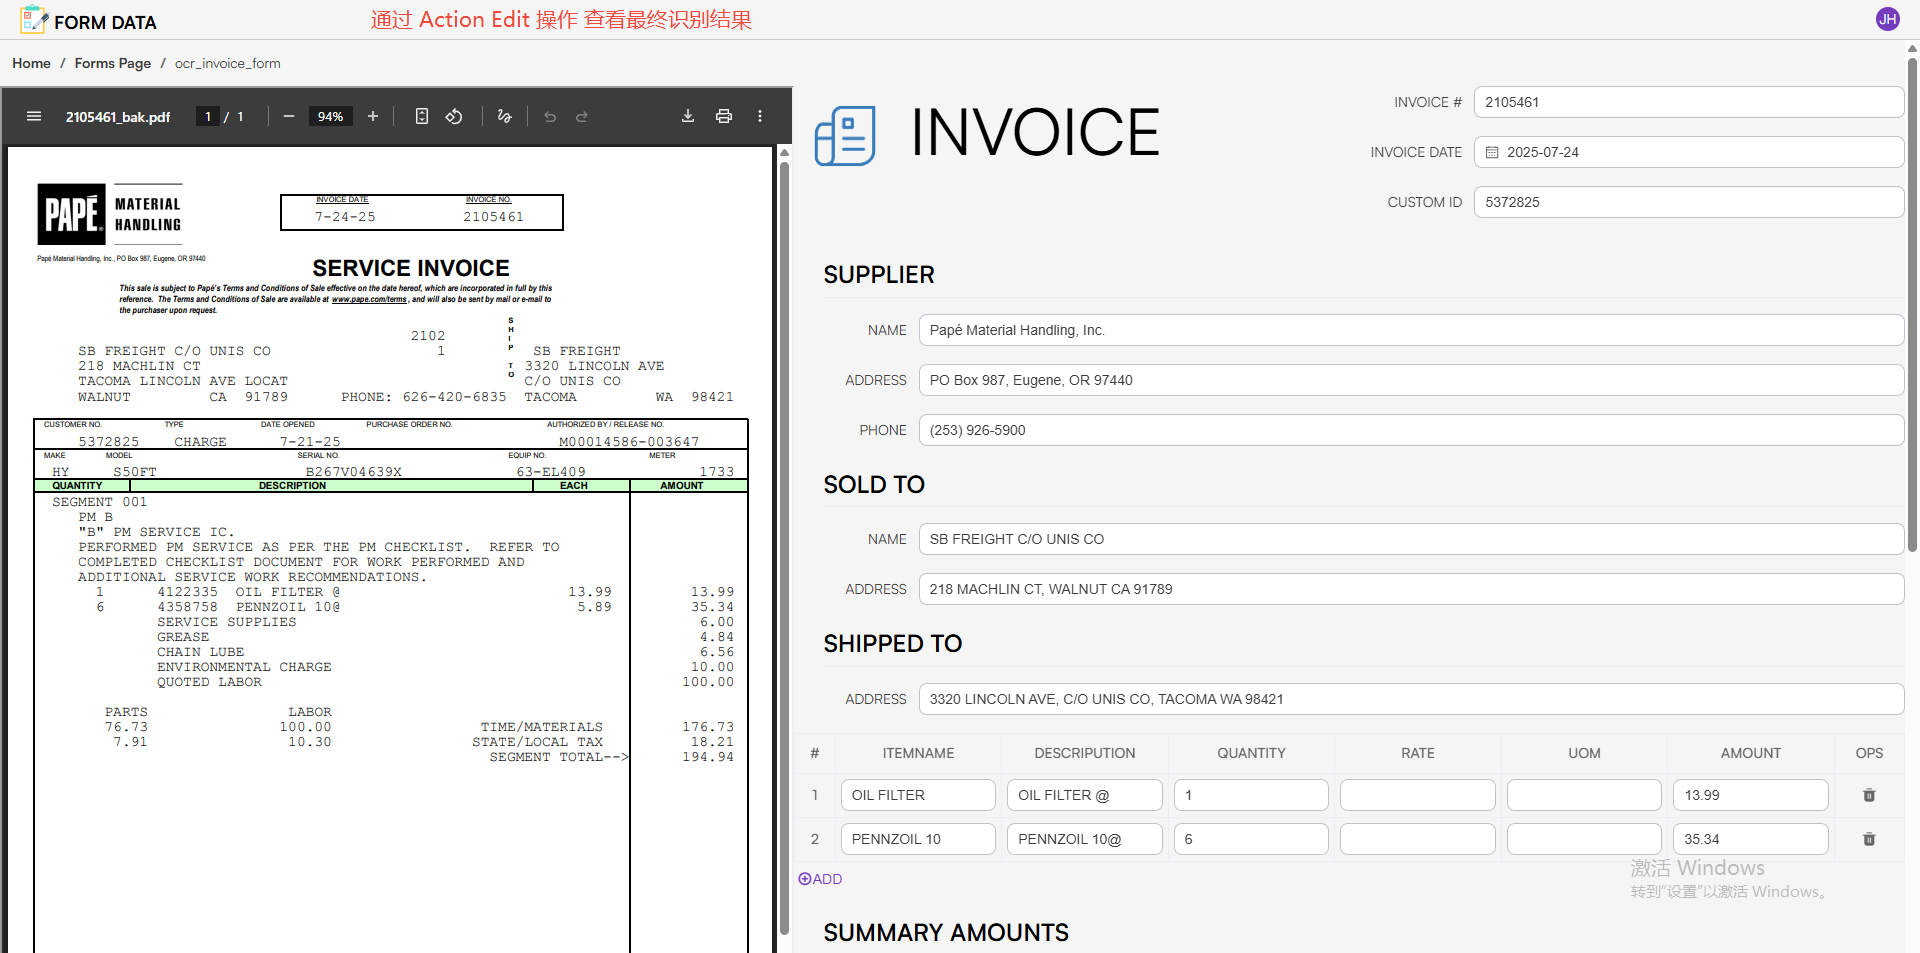
Edit
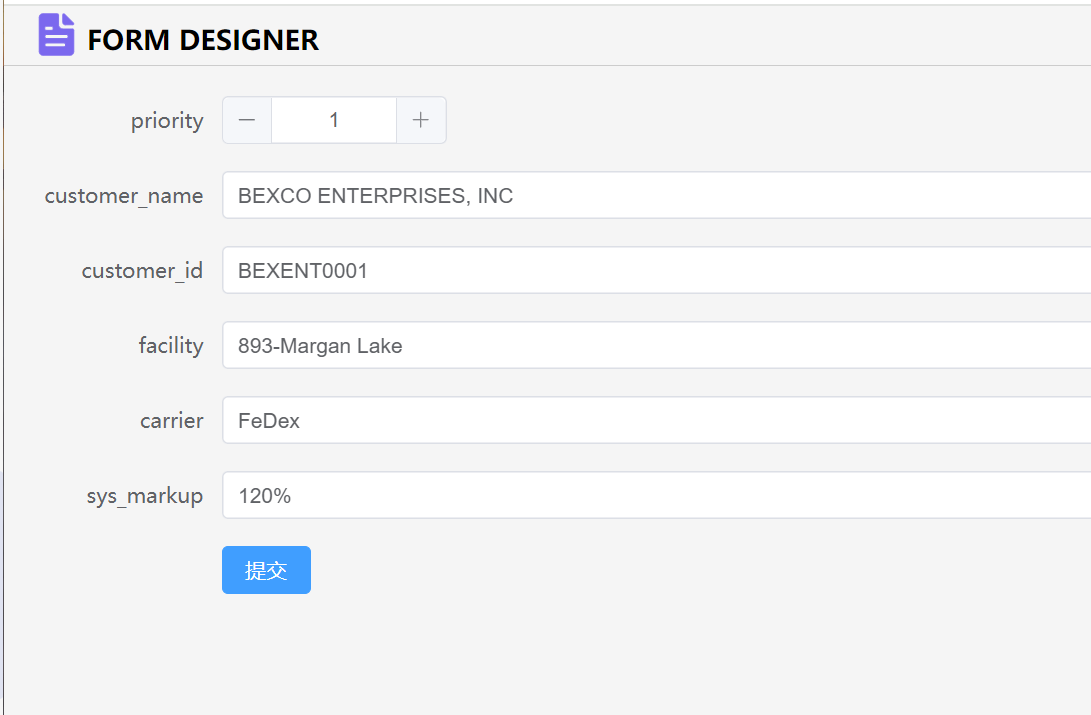
Modify a single record and submit the changes.
The following fields cannot be edited: id, createby, createtime, lastupdateby, lastupdatetime.
Delete
Delete a single record.
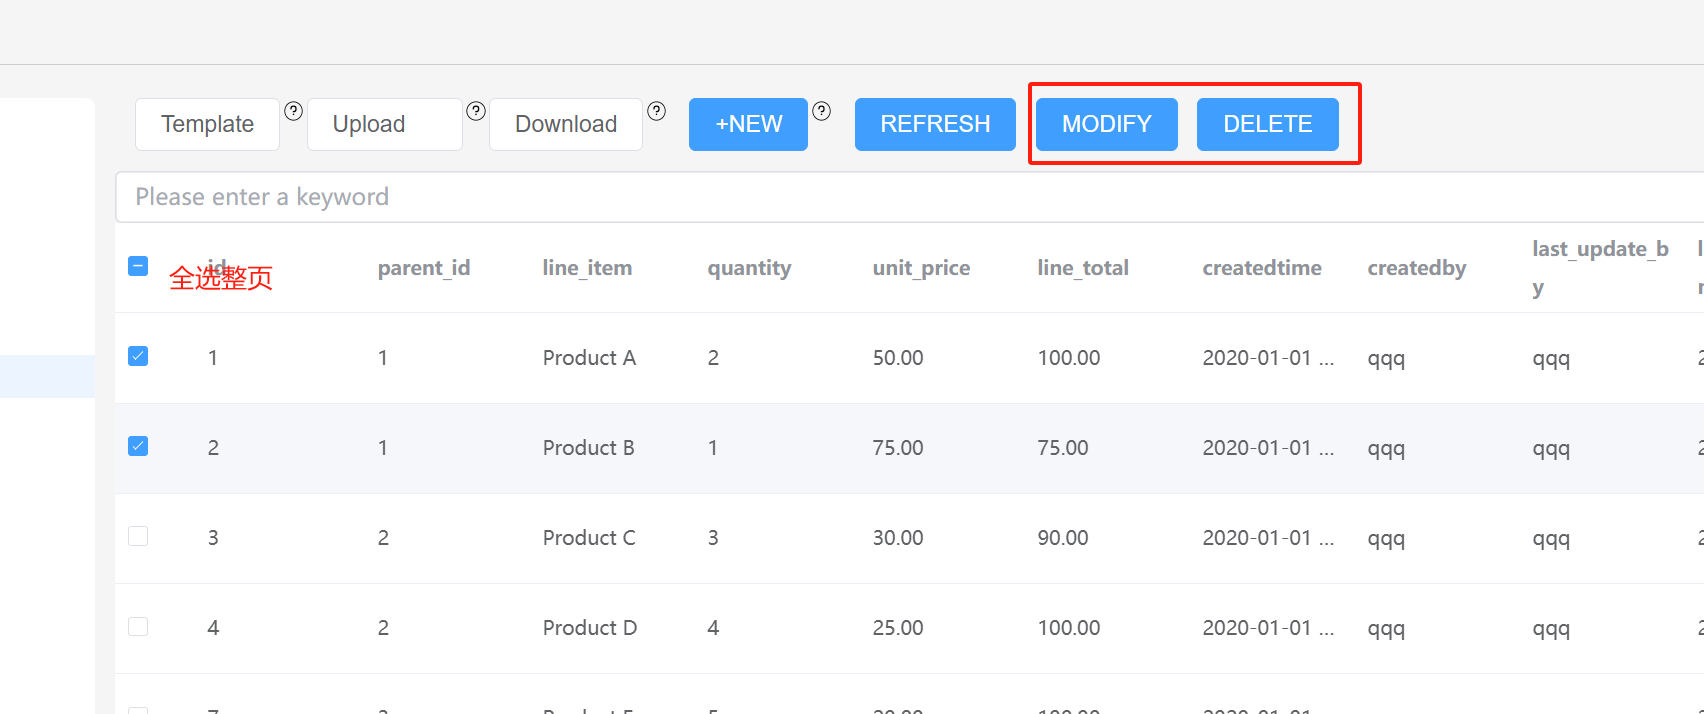
Bulk Edit and Delete
When records are selected, the Edit and Delete buttons become visible, allowing bulk operations. Bulk modification requires that no field other than id has a uniqueness constraint.
Search
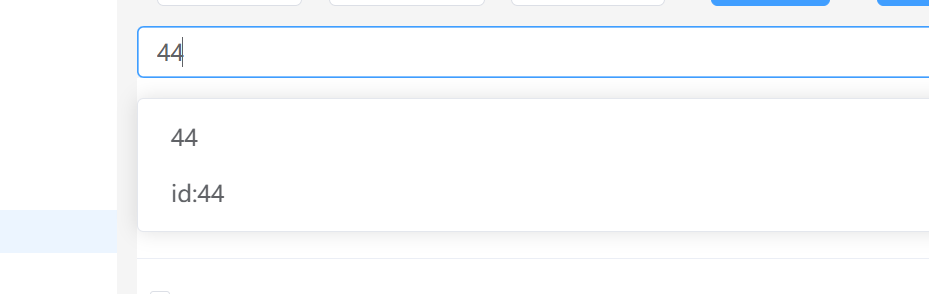
Enter text in the search box to trigger a fuzzy search on indexed fields. The search executes when the input box loses focus.
Sub-form
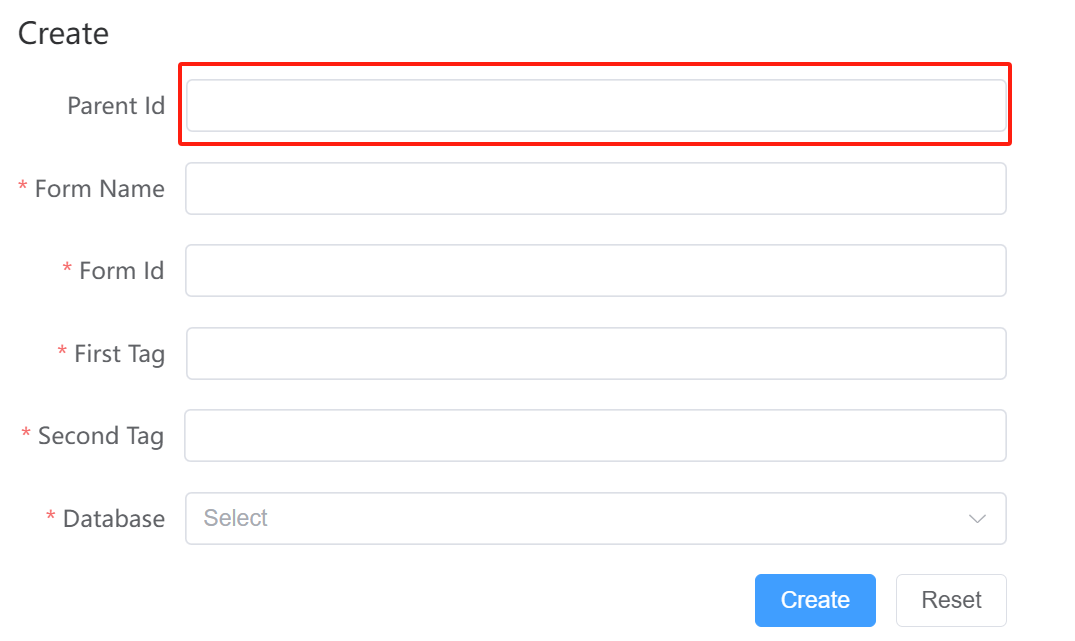
When creating a form, assign a parent_id to the sub-form — the parent_id should be the form_id of the parent form. A single form can have multiple sub-forms.
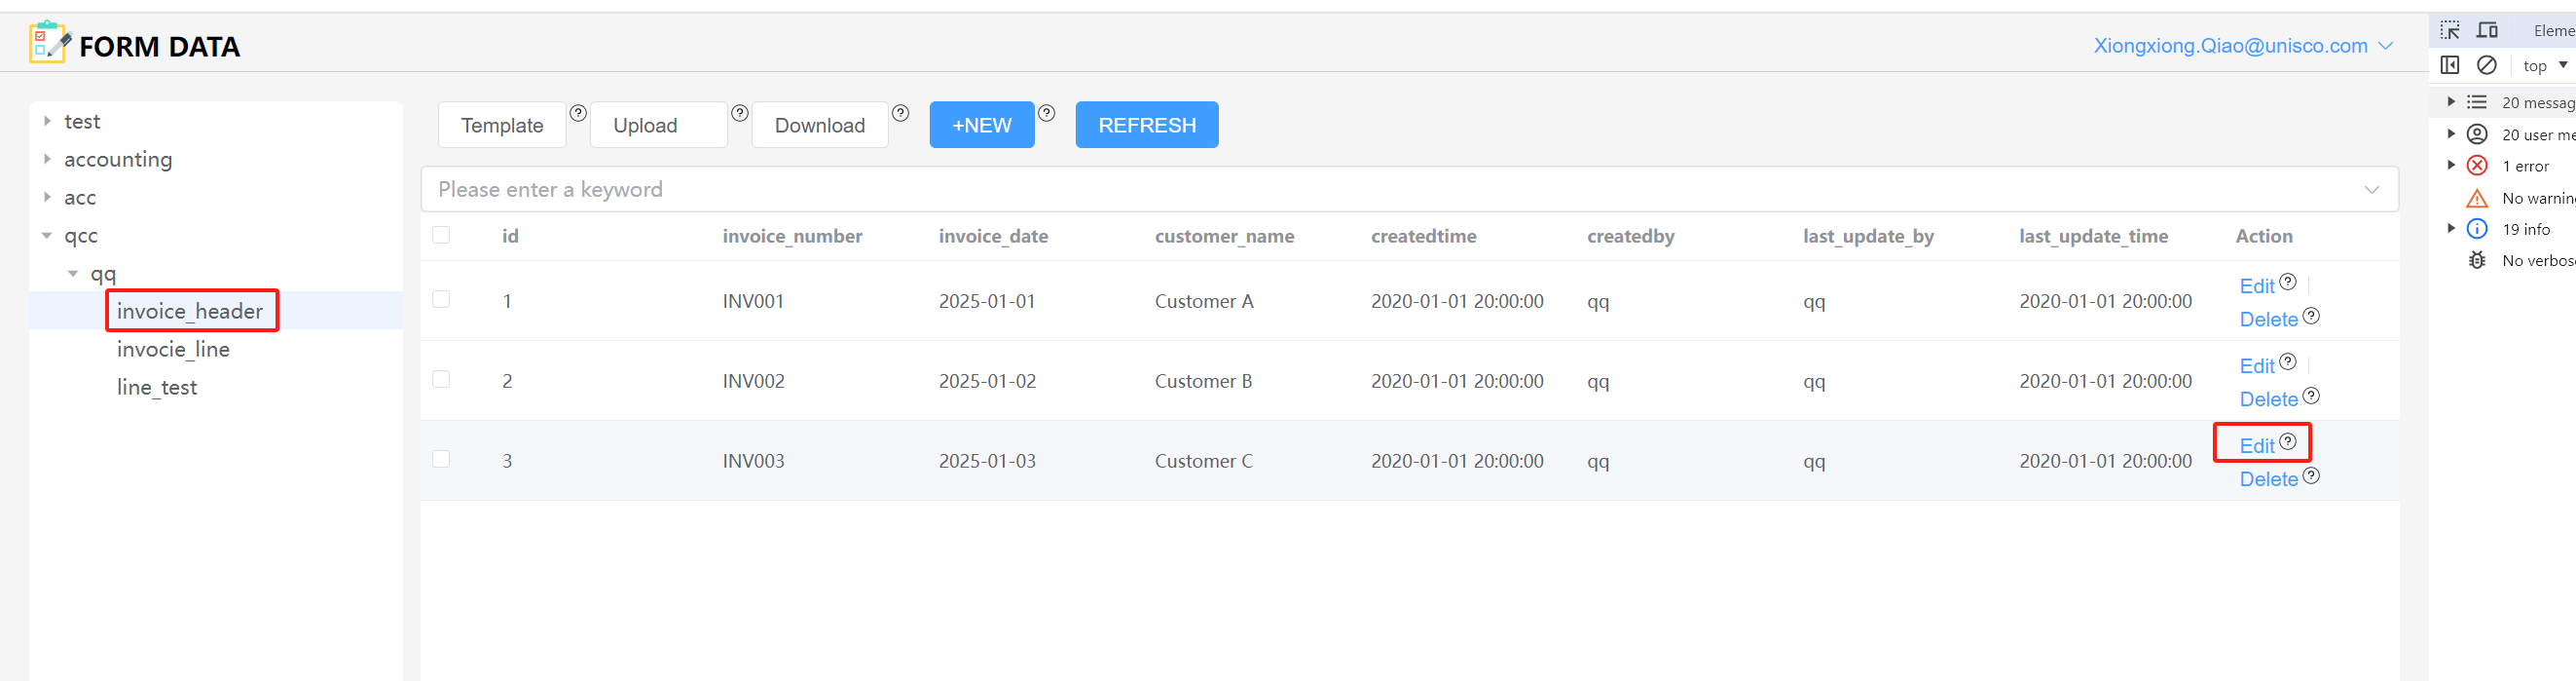
In the Data view, if a sub-form exists, click Edit to access it:
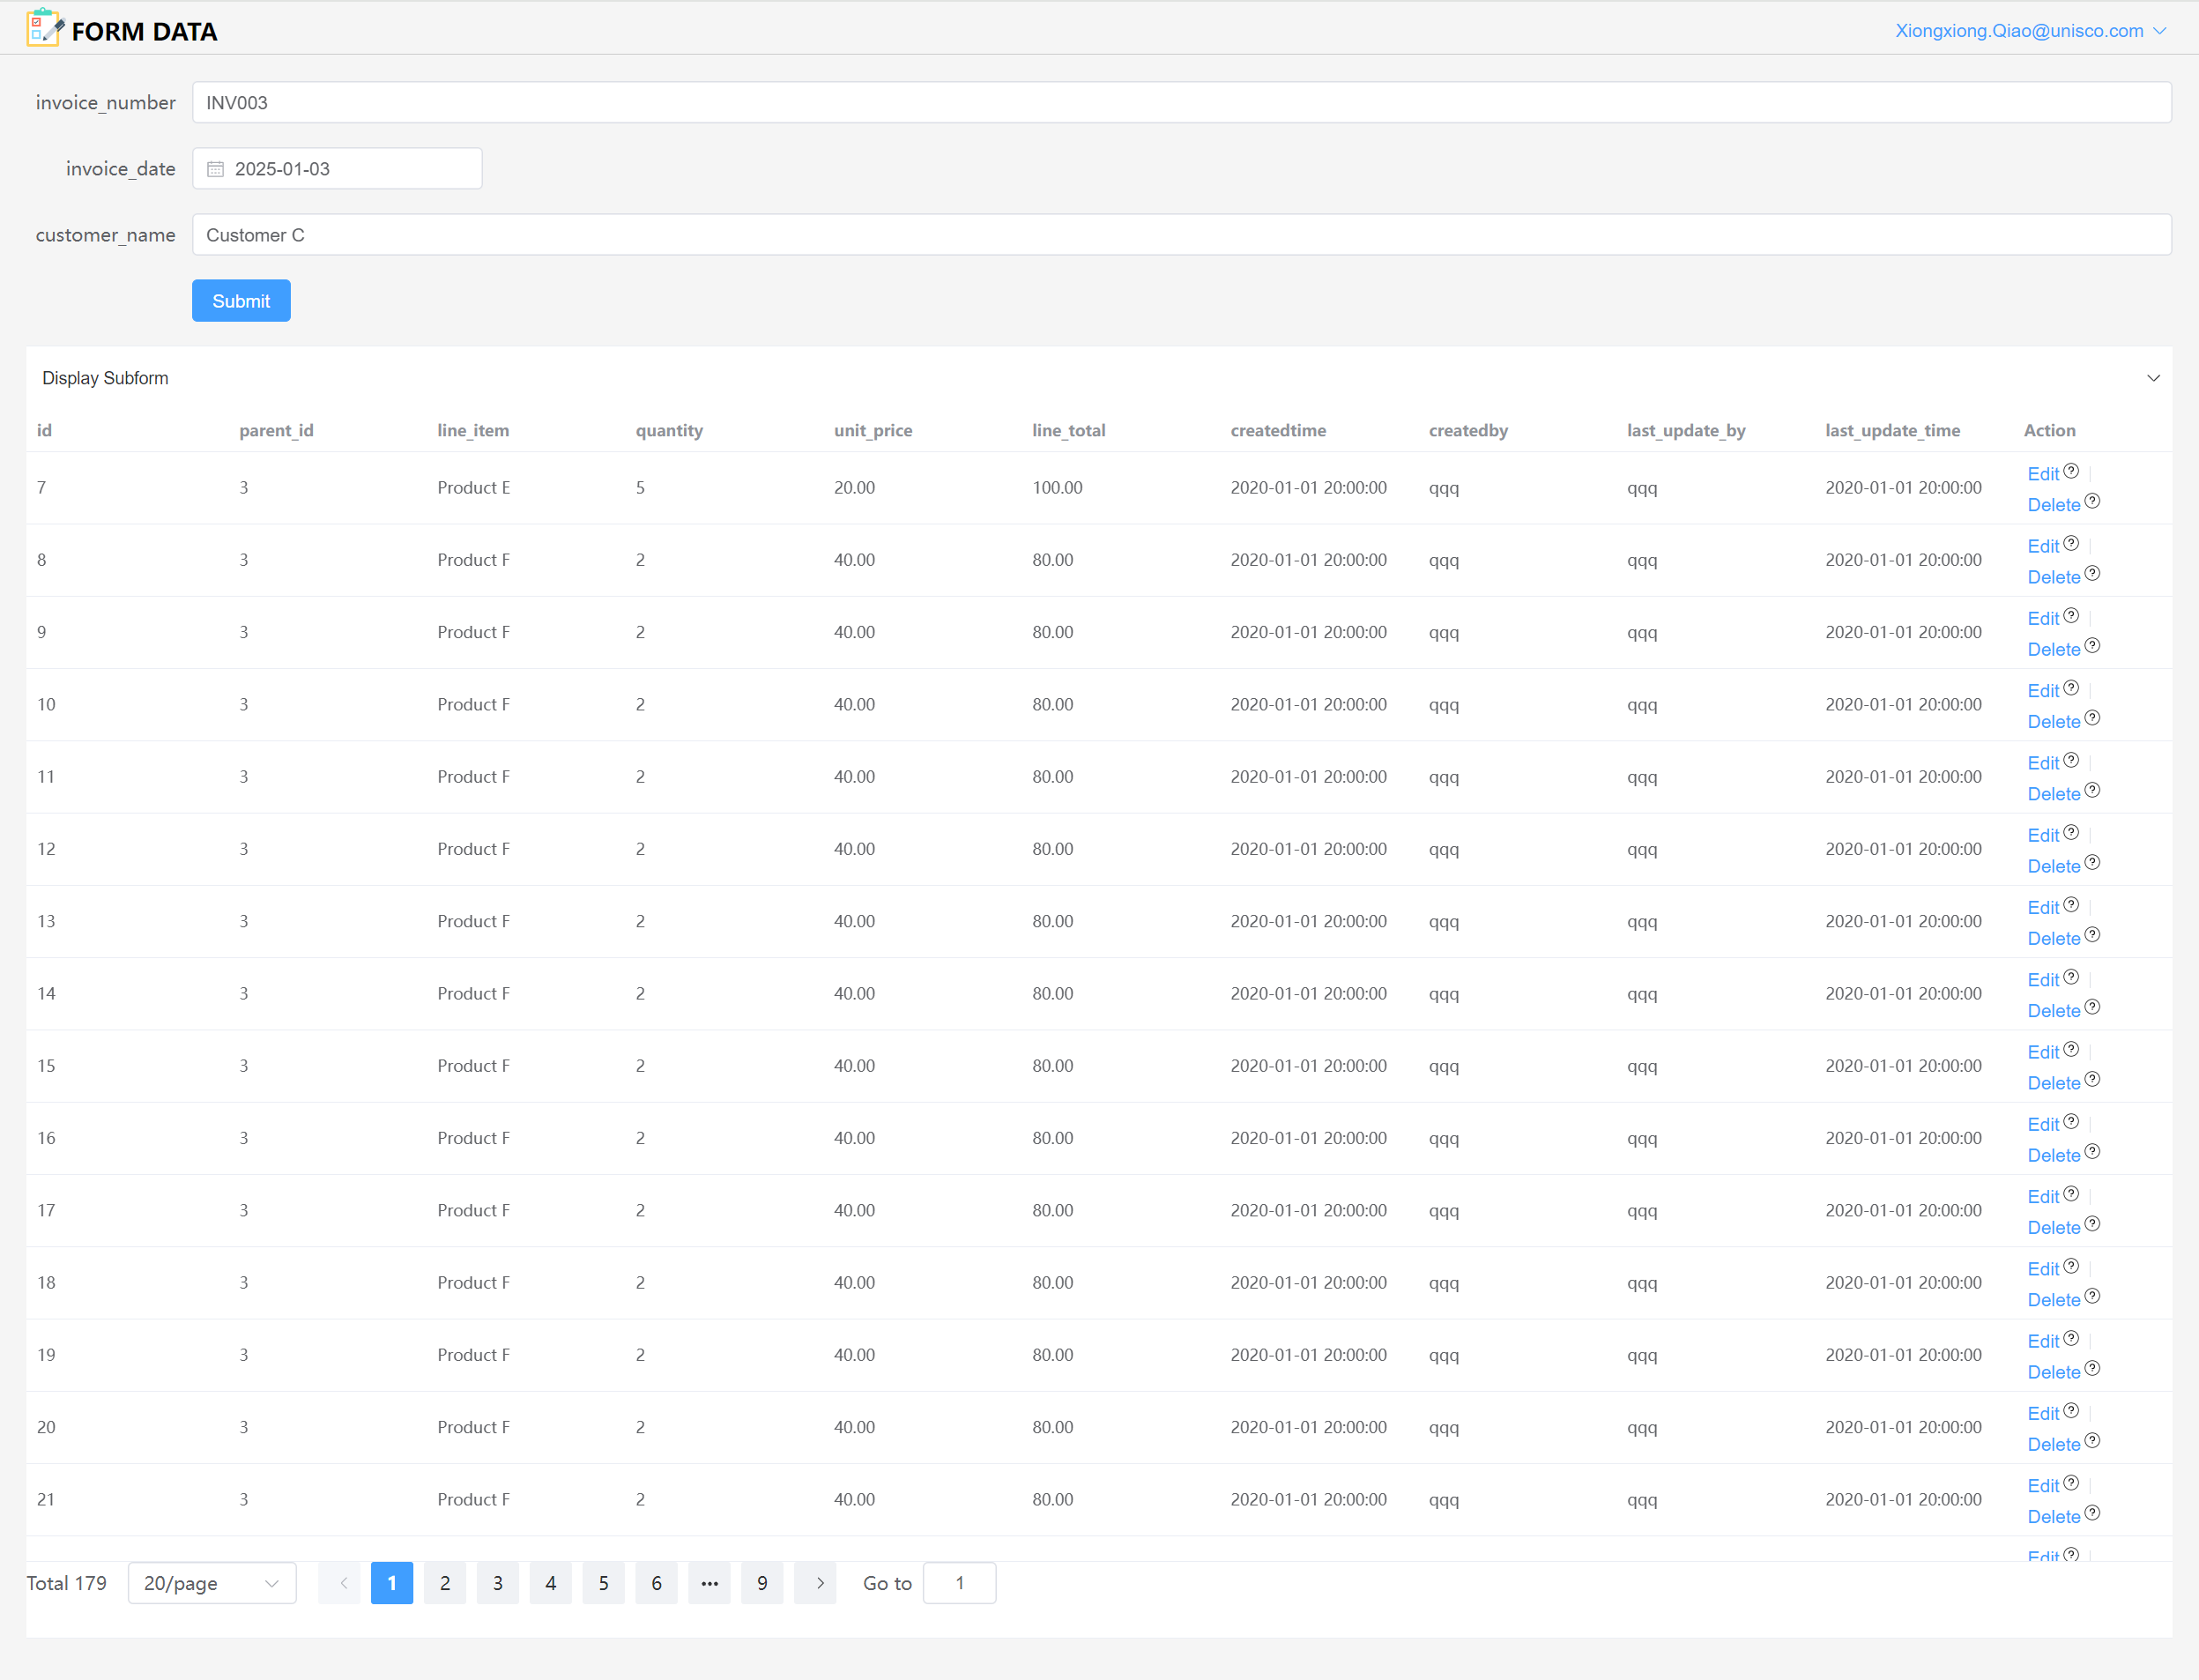
Sub-forms support create, read, update, and delete operations.

Refresh
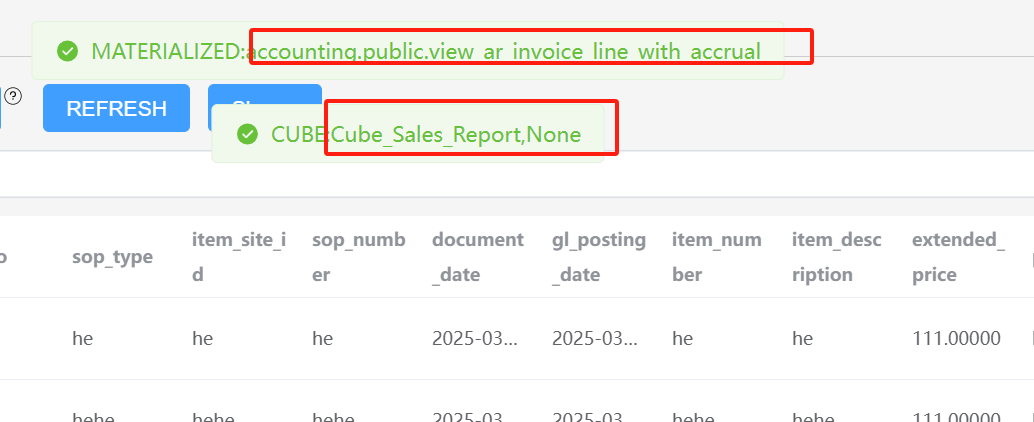
One-click refresh of all materialized views and Cube caches associated with the current table. A notification will display the names of the refreshed views and cubes.
Share
Two sharing modes are available:
a. Share for creation (no data selected): Allows the target user to create new records. The user can only view records they created.
b. Share for editing (with data selected): Shares specific records with a user. The createby field of the shared records is updated to the target user's account.
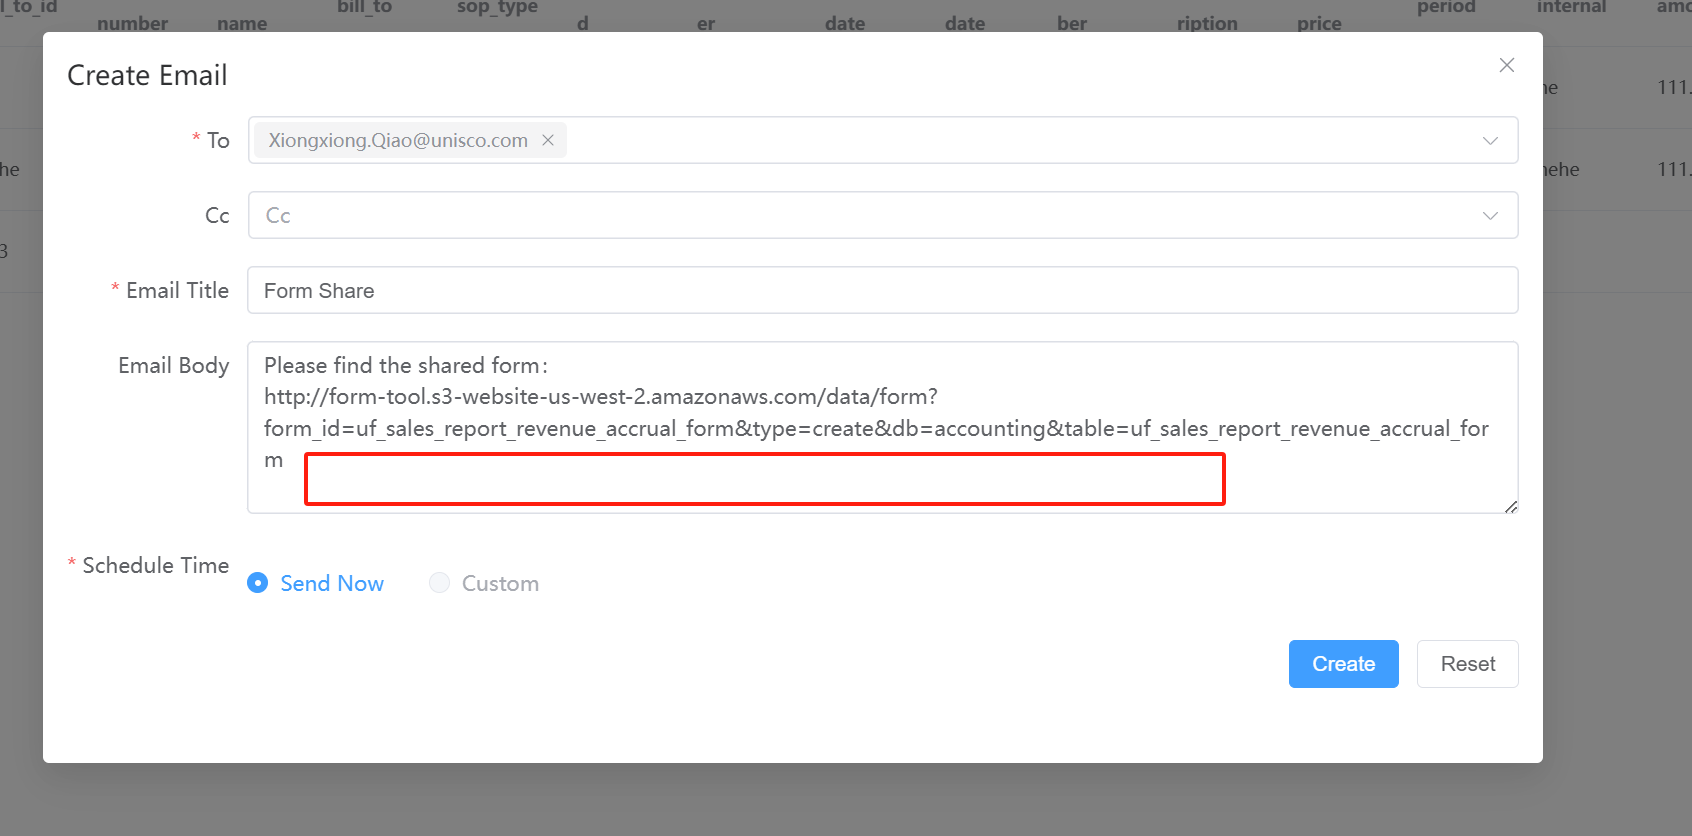
- Share form: All shared users can create new data records.
- Share data (single or multiple records): Can only be shared with one user at a time. The user can then create, read, update, and delete that record.
Events
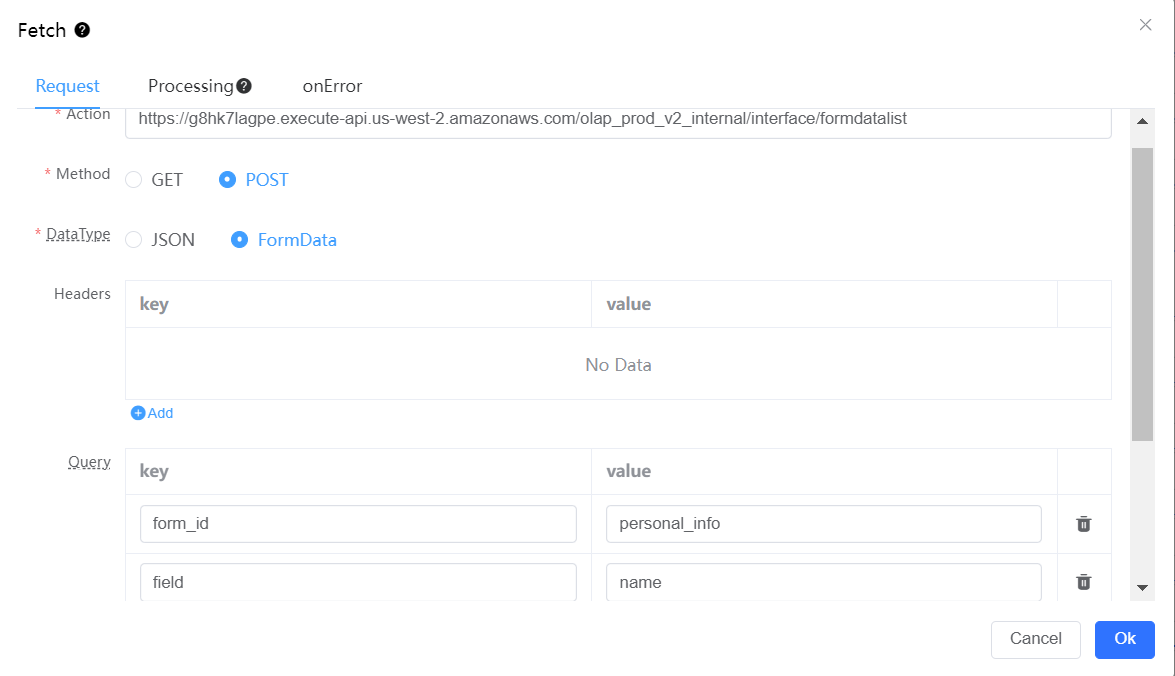
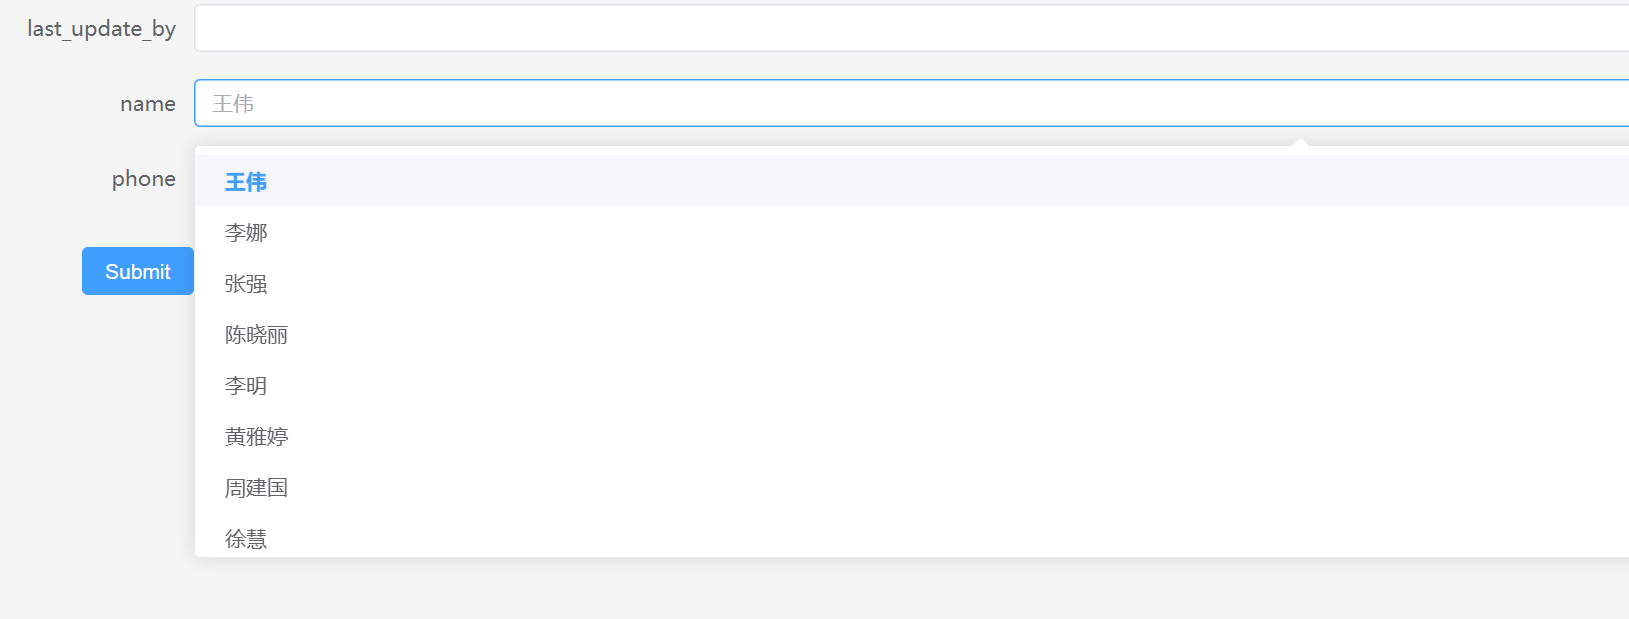
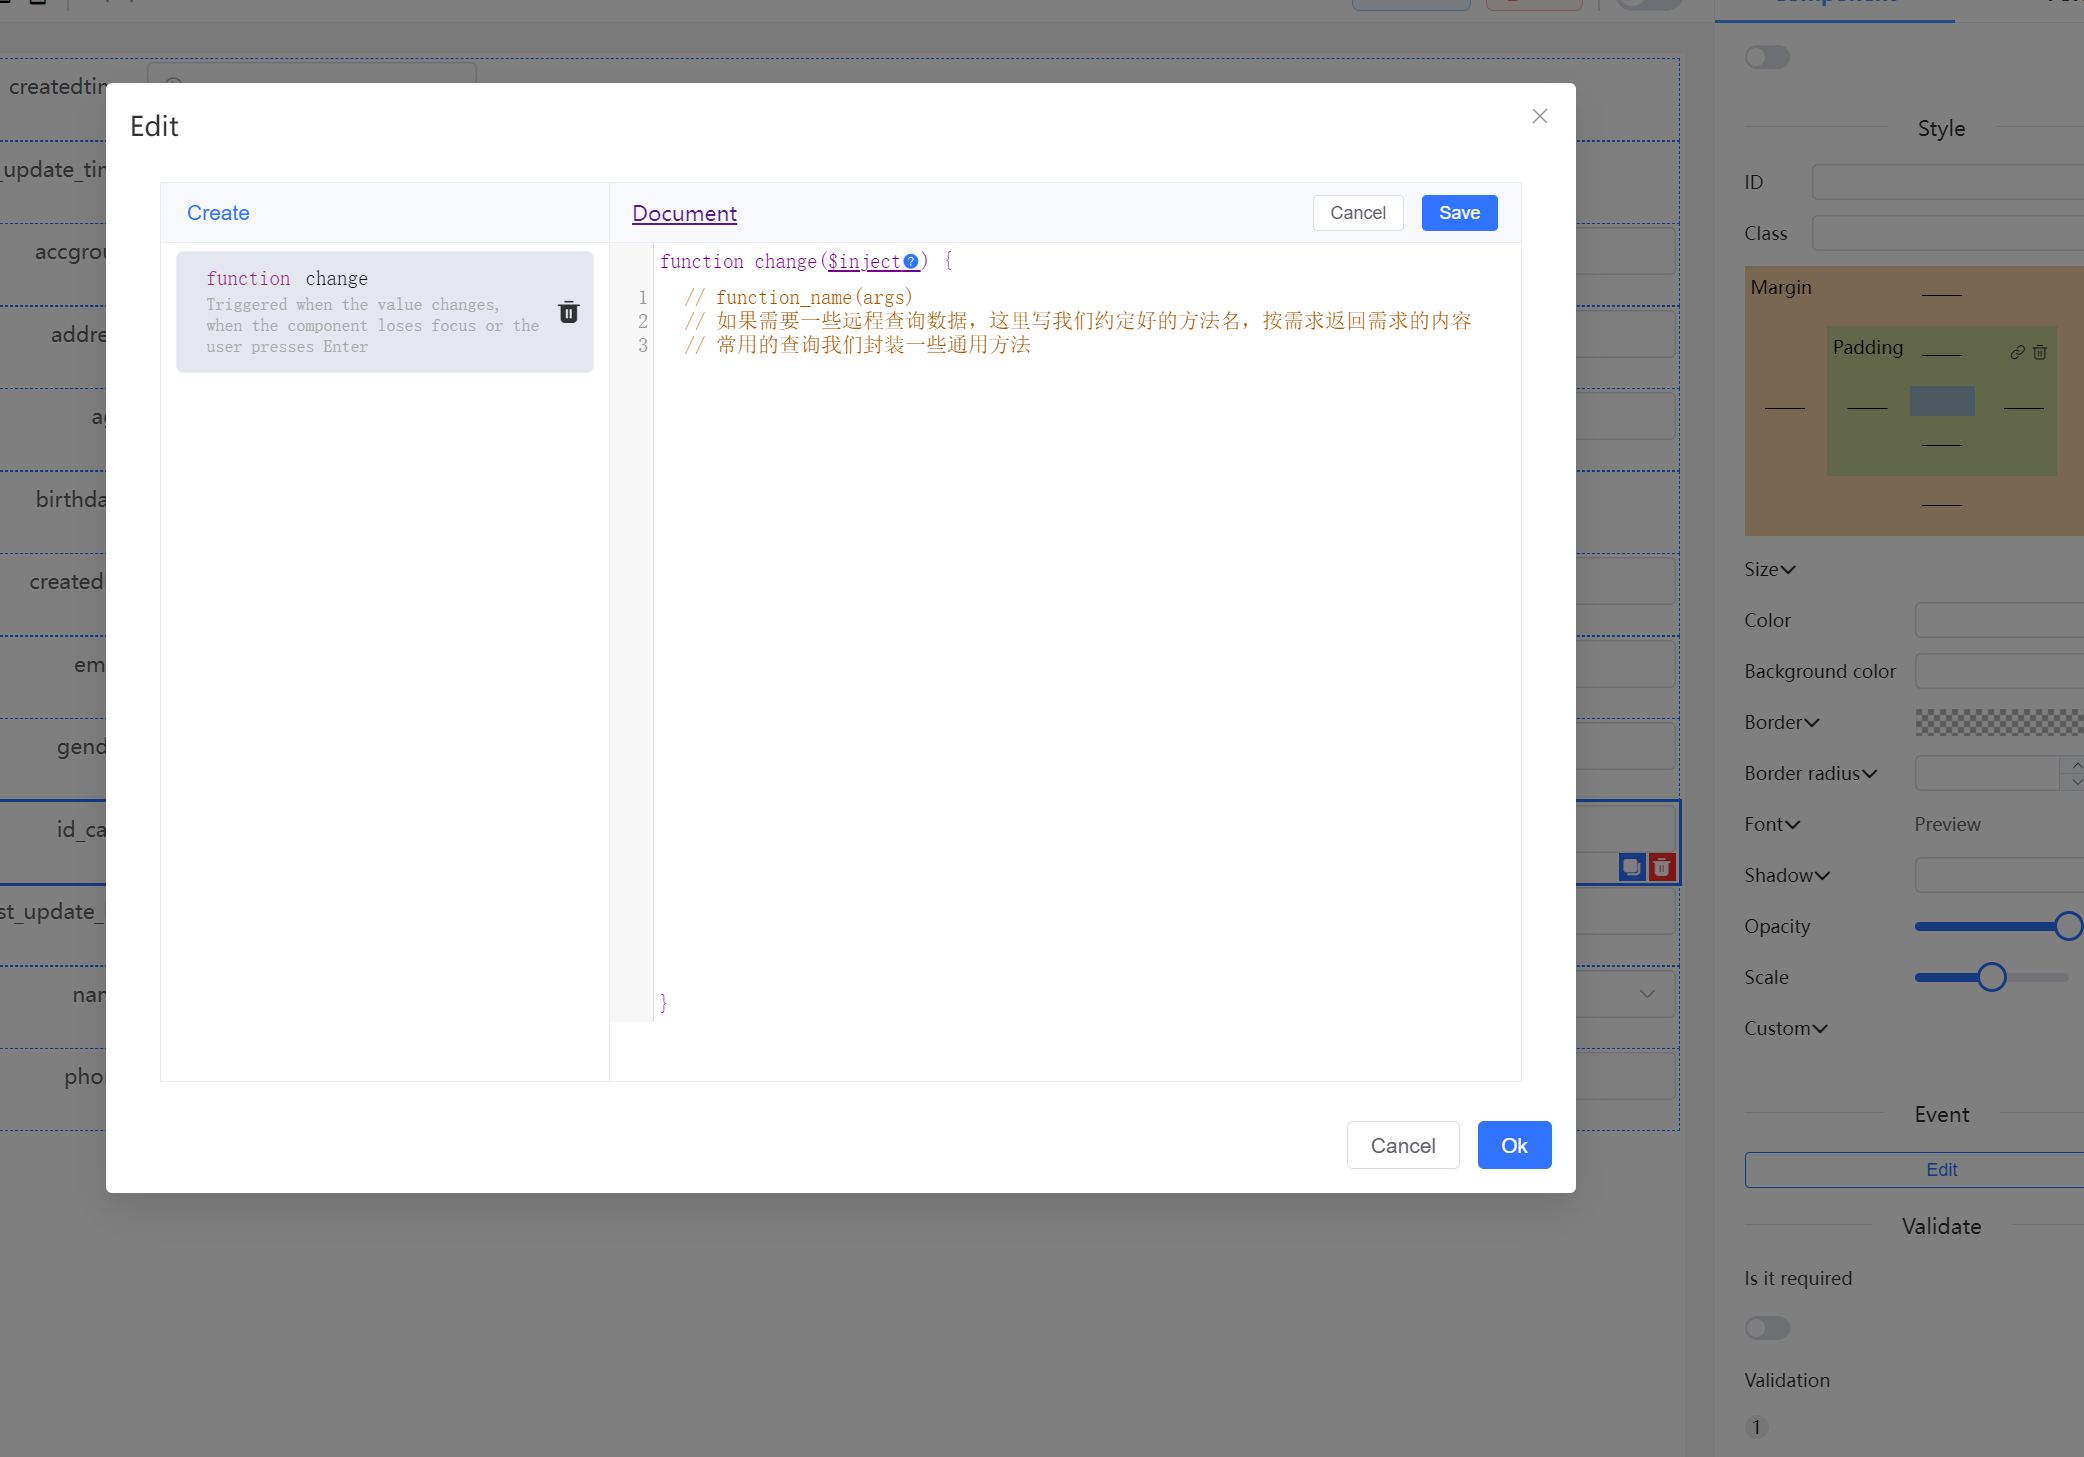
Remote Dropdown Data
Fetch URL:https://g8hk7lagpe.execute-api.us-west-2.amazonaws.com/olap_prod_v2_internal/interface/formdatalist
Parameters:
form_id— the target formfield— field name to use as the dropdown list
Component Interaction via JavaScript
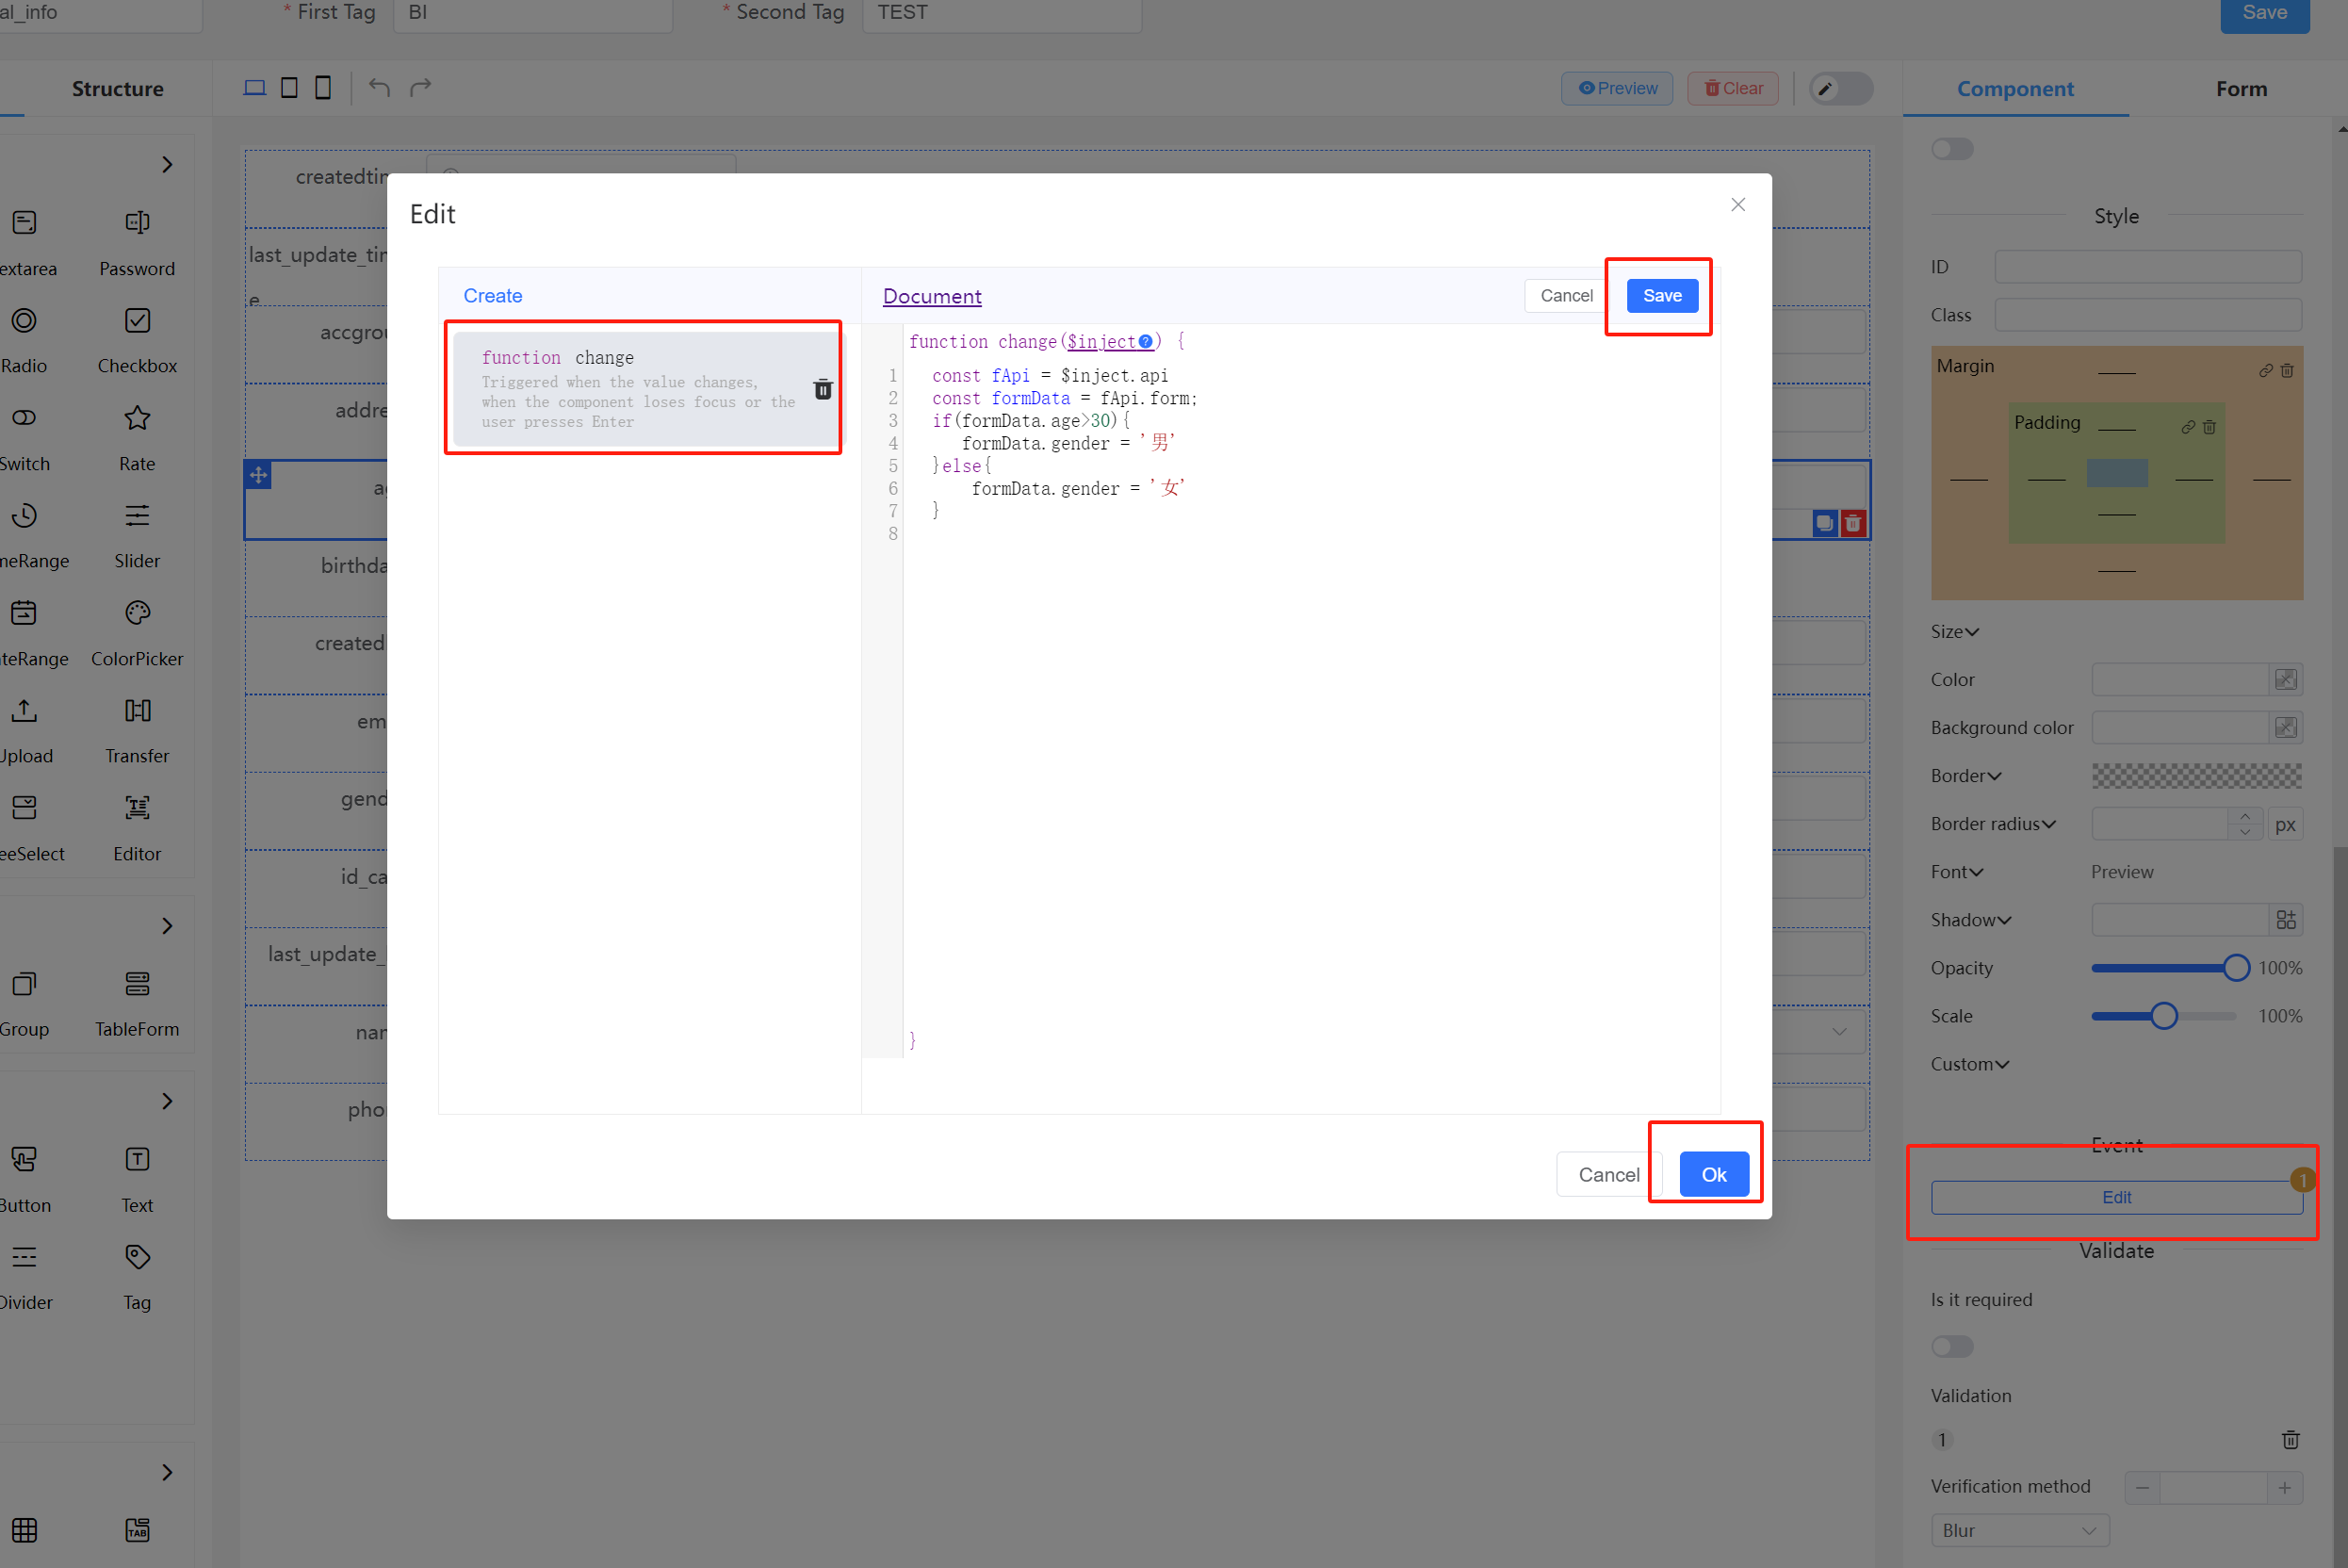
Example: Set gender based on age
When age > 30, set gender to "Male"; otherwise set to "Female".
javascript
const fApi = $inject.api
const formData = fApi.form;
if (formData.age > 30) {
  formData.gender = 'Male'
} else {
  formData.gender = 'Female'
}
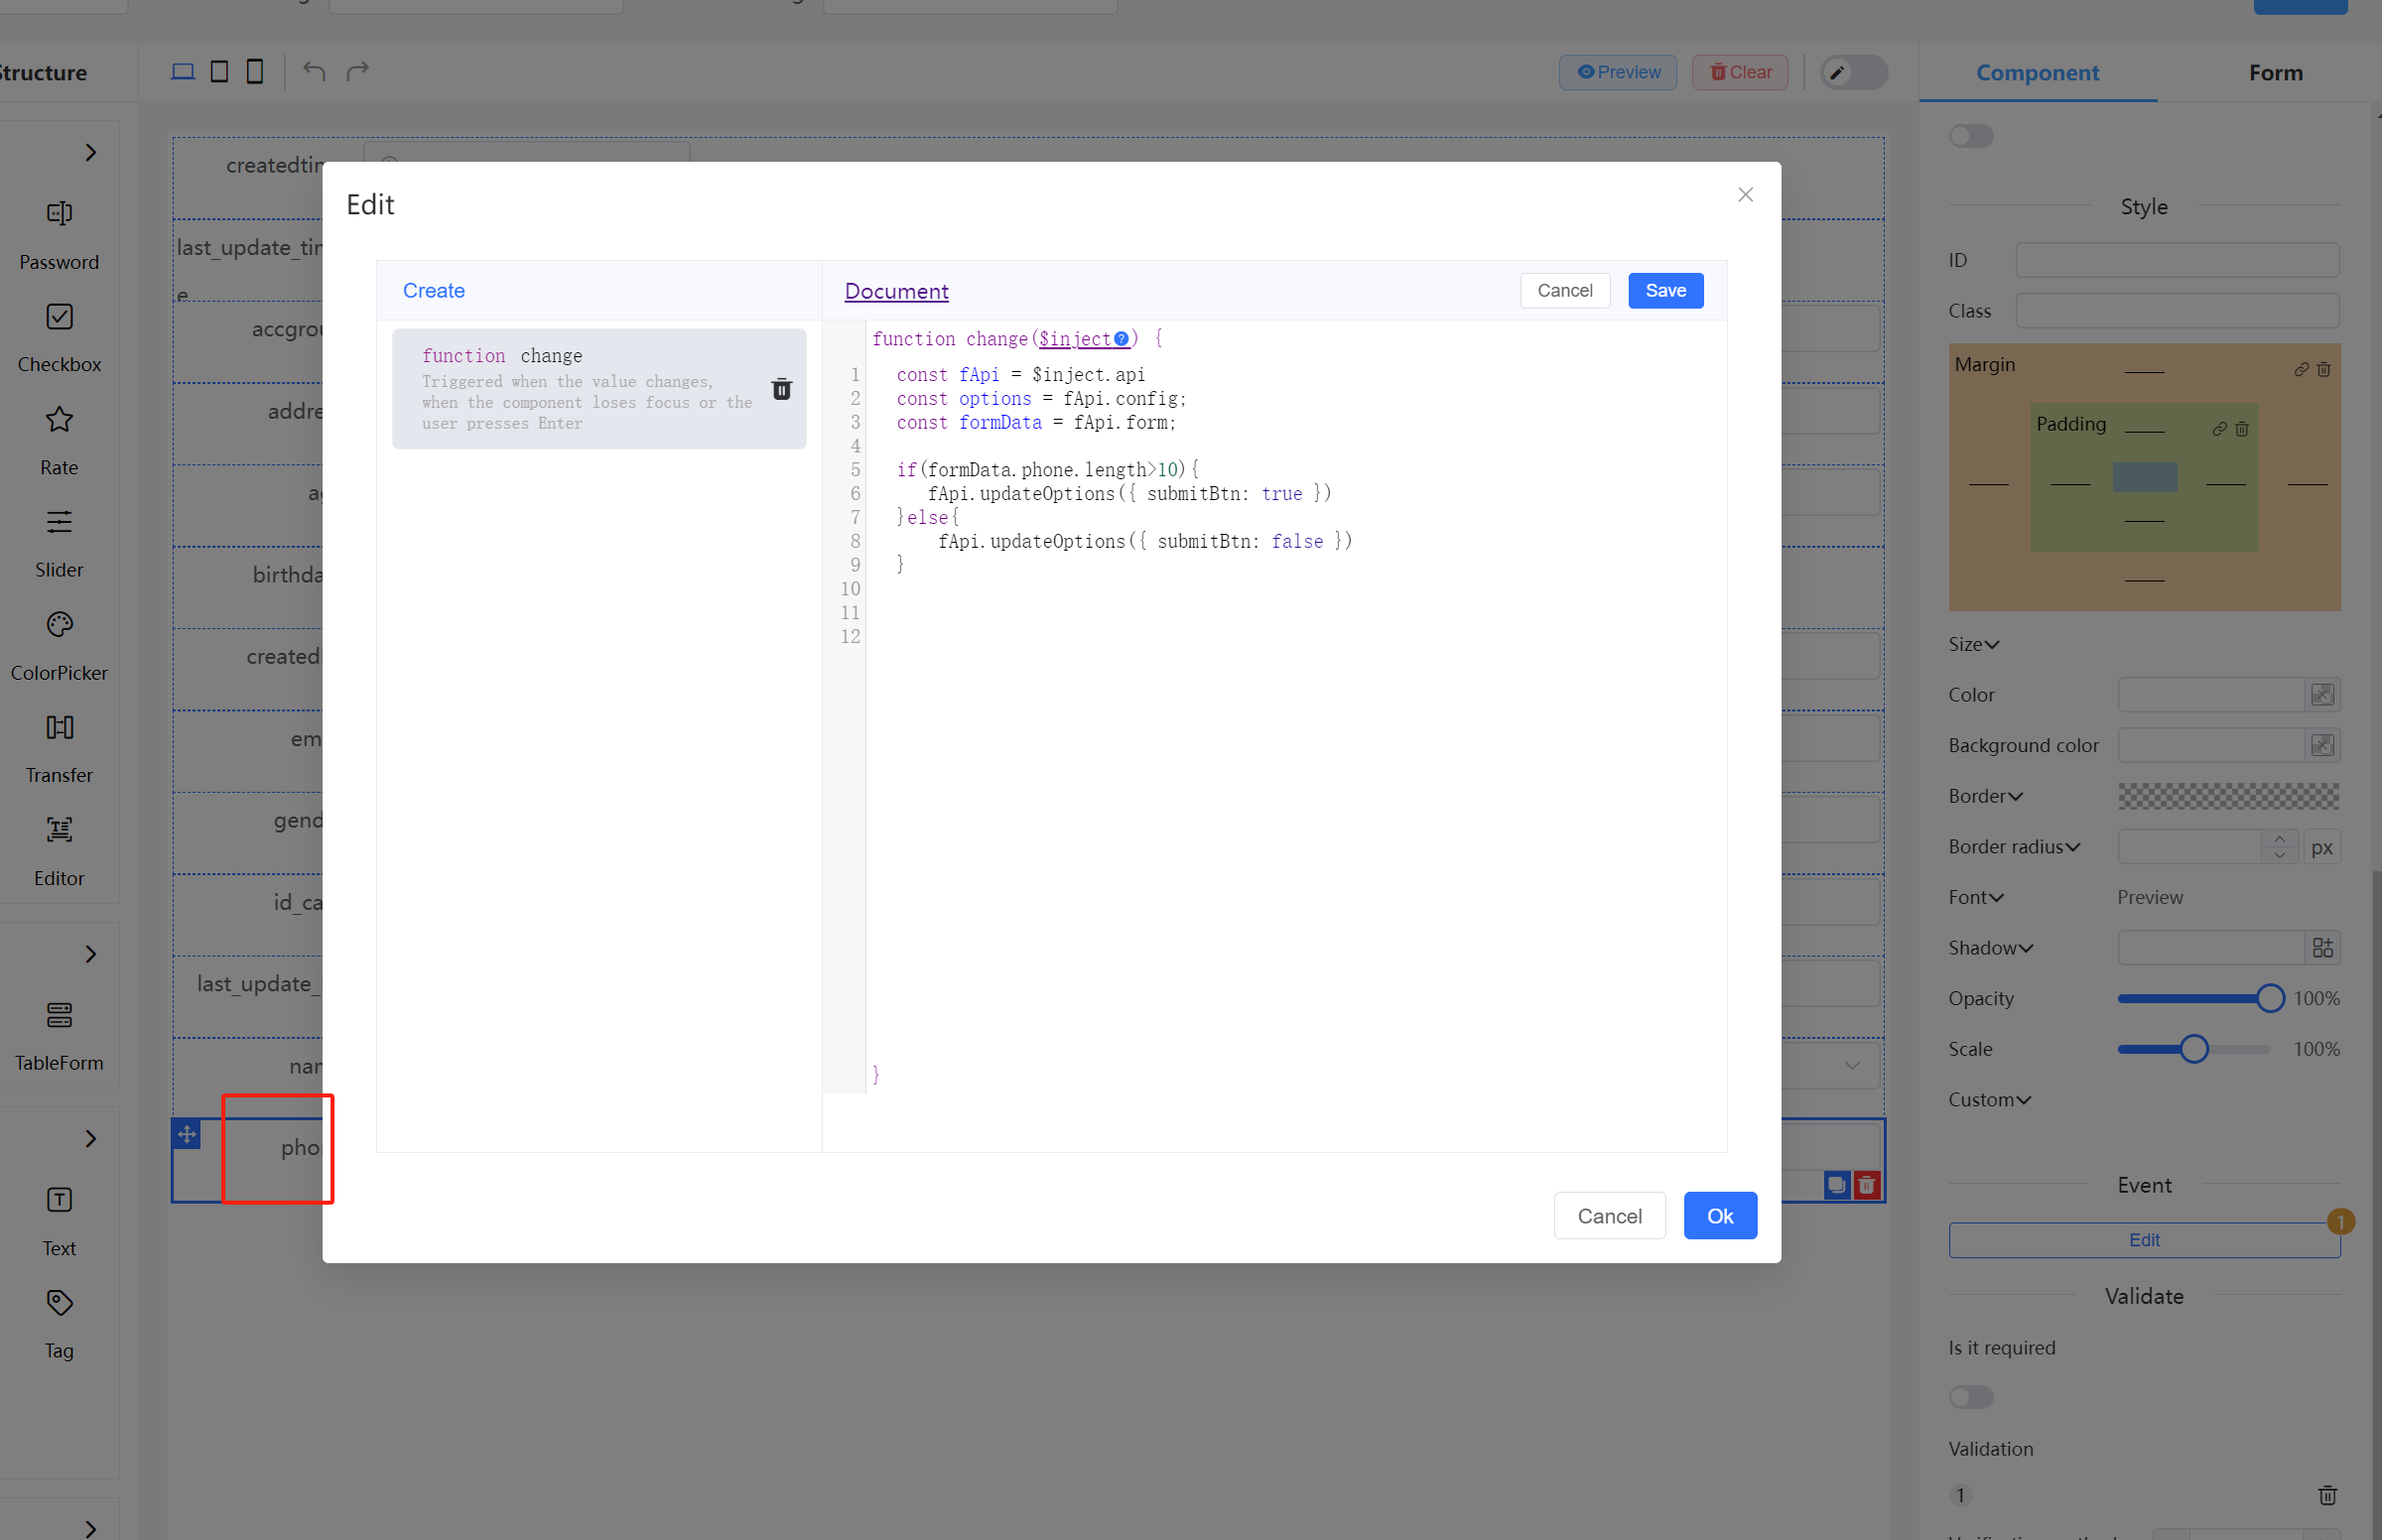
Example: Hide submit button when phone number is too short
javascript
const fApi = $inject.api
const options = fApi.config;
const formData = fApi.form;

if (formData.phone.length > 10) {
  fApi.updateOptions({ submitBtn: true })
} else {
  fApi.updateOptions({ submitBtn: false })
}
Remote Query
File Upload
1. Overview
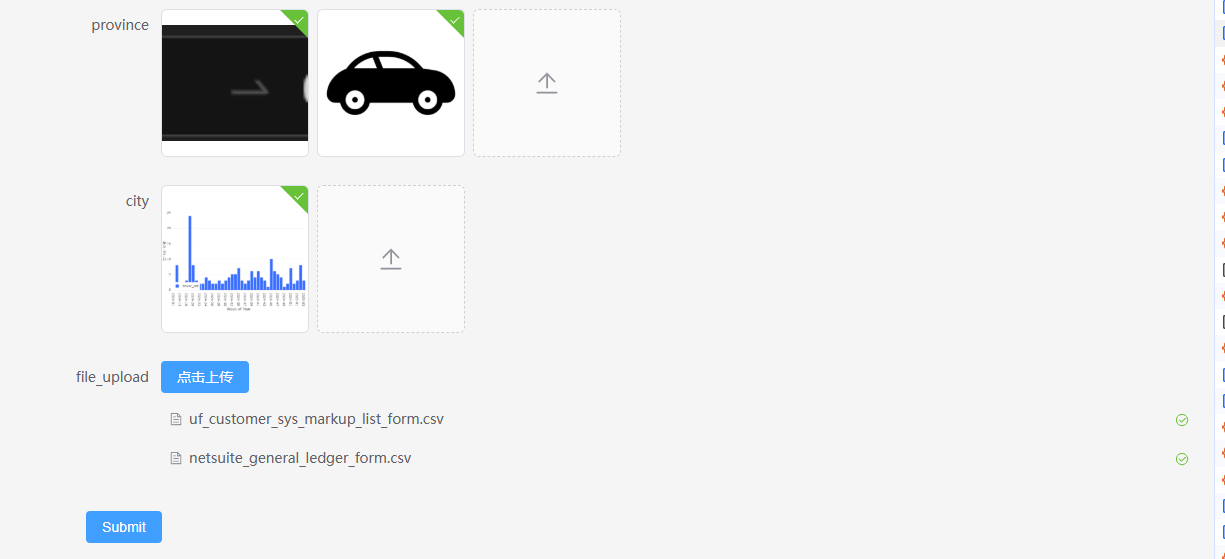
Configure an Upload component in the Designer page to enable file uploads. Uploaded files can then be accessed from the Data page.
2. Configuration Steps
2.1 Configure the Upload Component in the Designer
- Select the Upload component type in the Designer page.
- Set the upload file type (e.g.,
text). - Save the configuration.
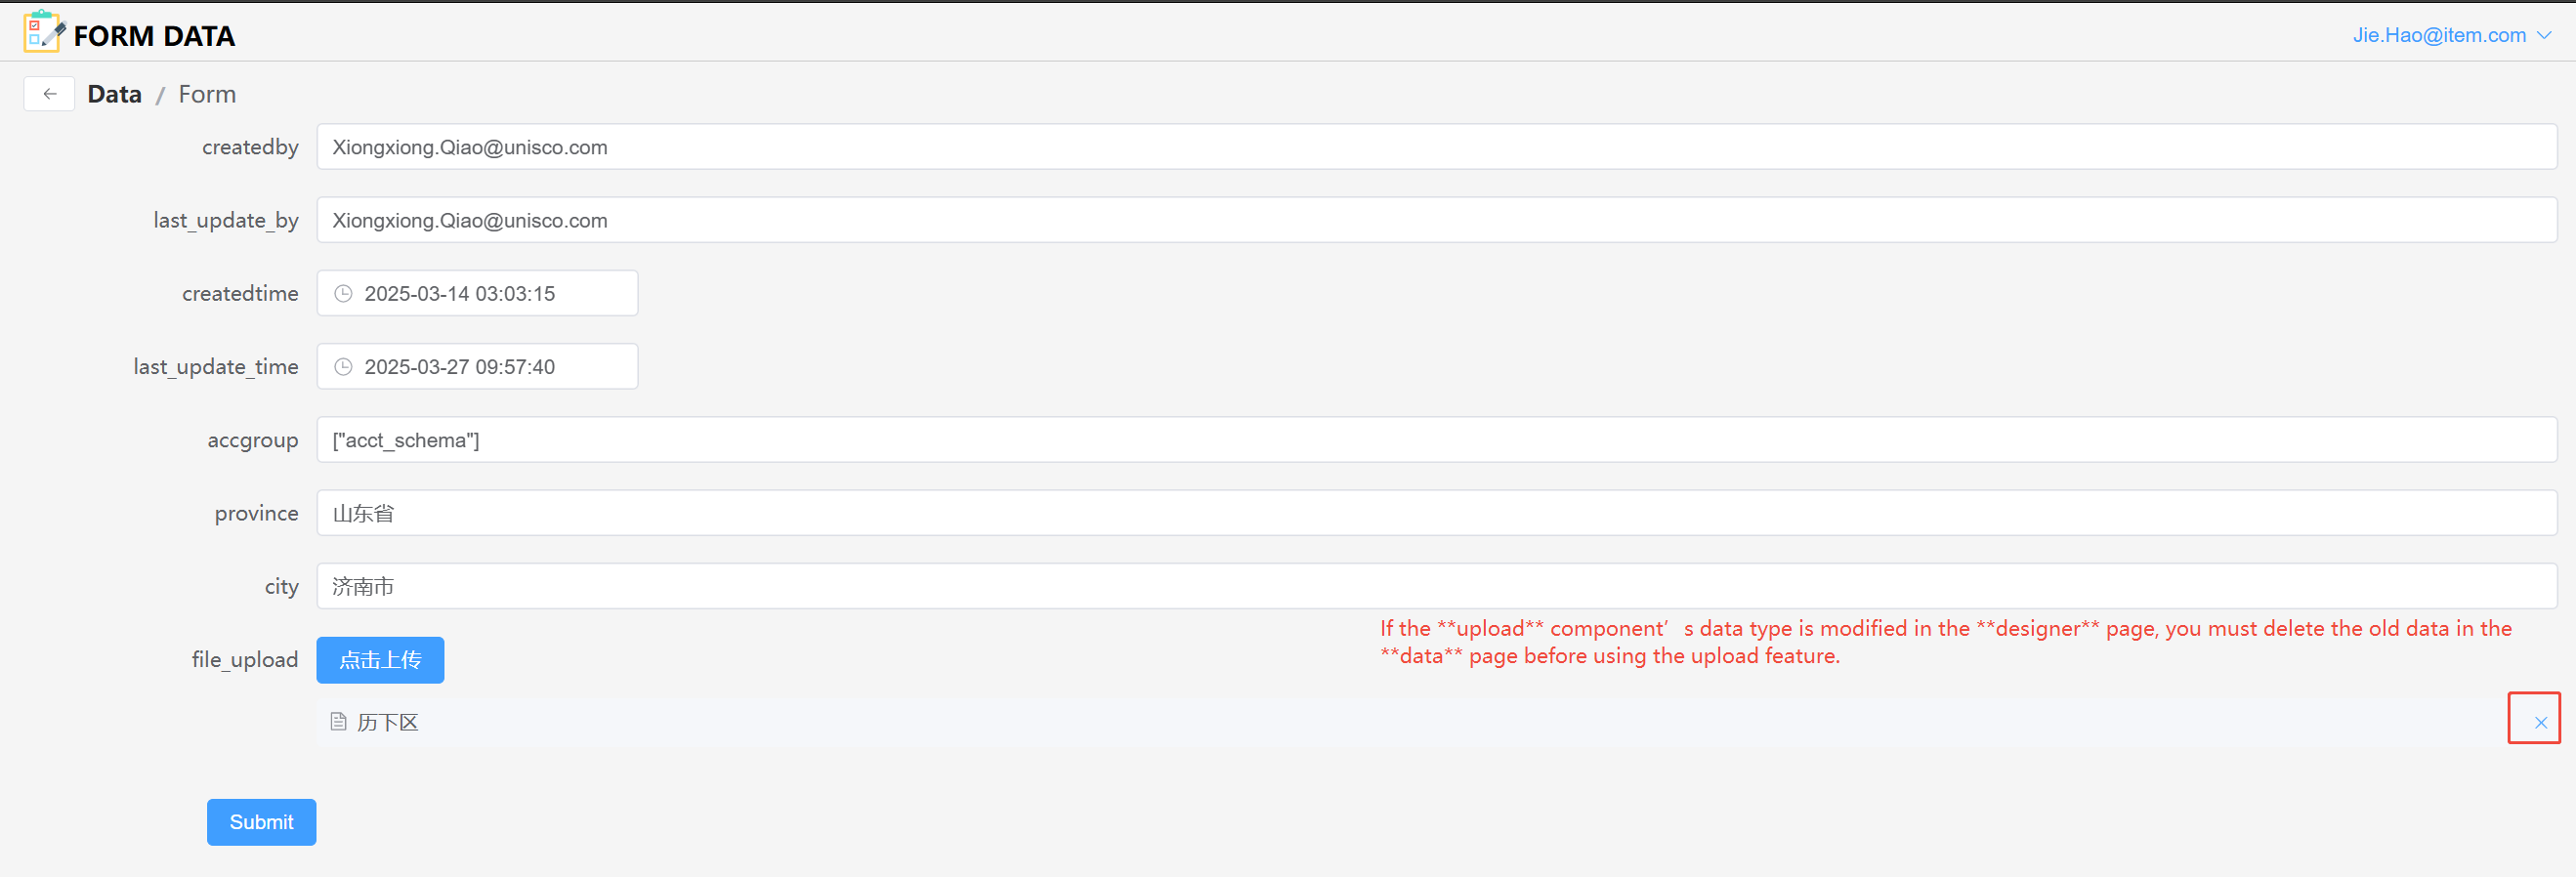
2.2 Test File Upload in the Data Page
- Go to the Data page and open the New/Edit dialog.
- Click Upload to upload a file.
- After a successful upload, the filename will be displayed.
- Click the filename to access the stored file via its URL.
3. Notes
- If you change the data type of the Upload component in the Designer, you must first delete old data in the Data page before using the upload feature again.
- If you change an existing field type (e.g., from
inputtoupload), verify that the corresponding MySQL field length is sufficient.
4. Reference Screenshots
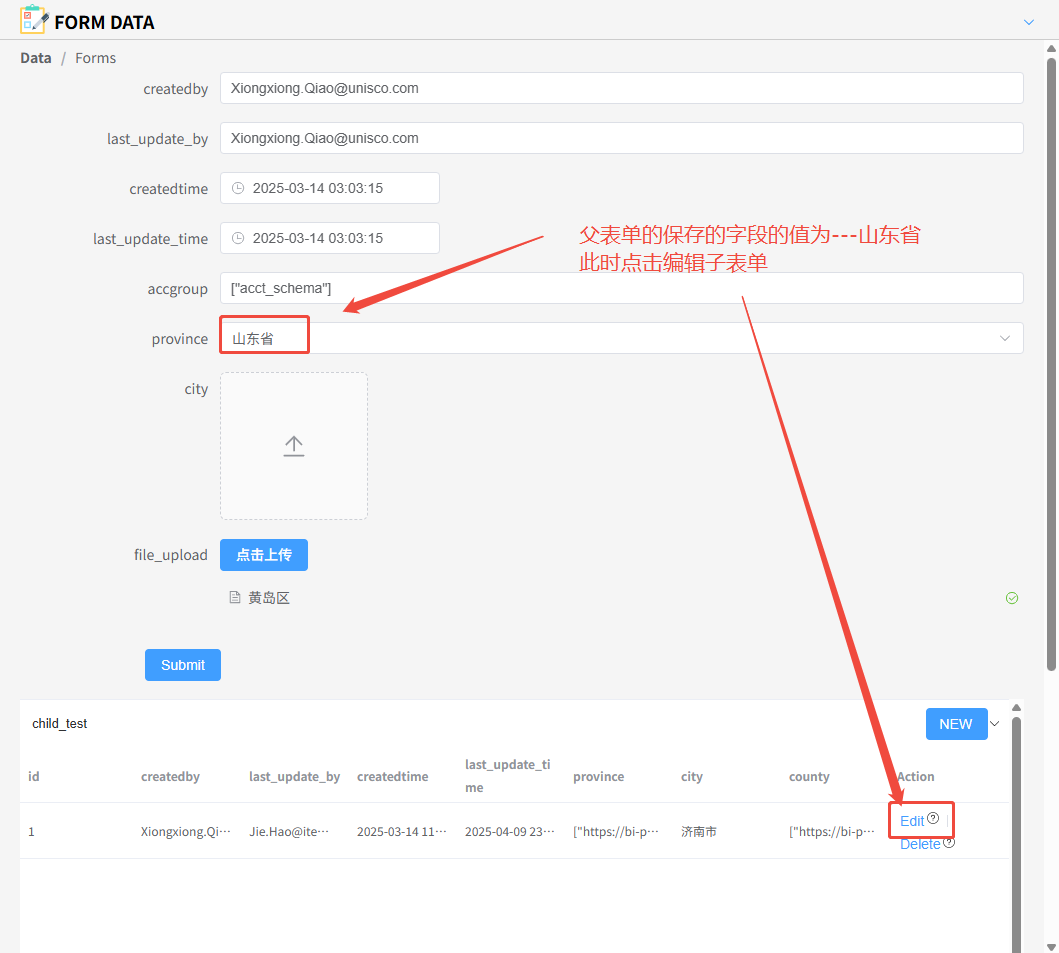
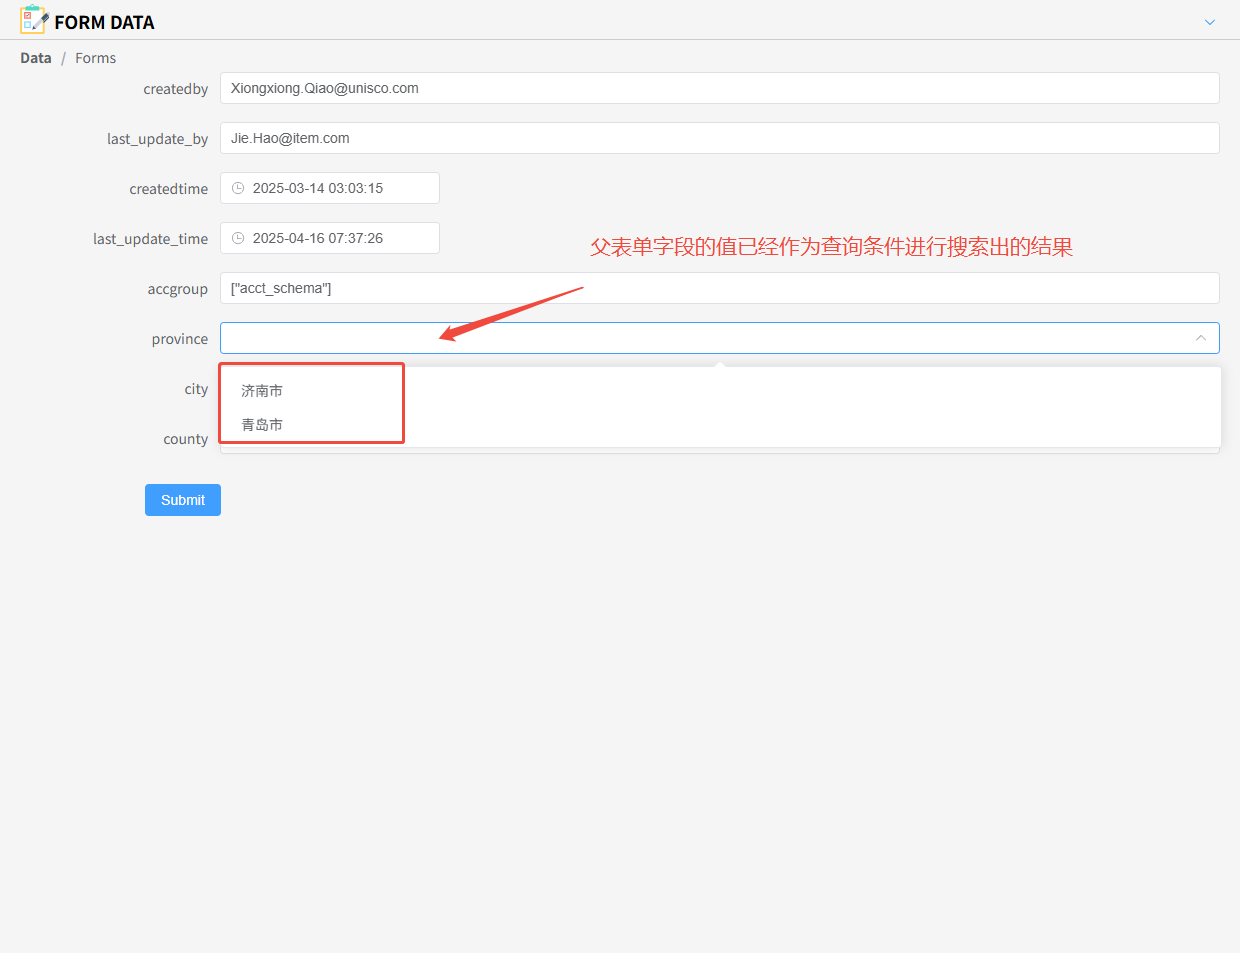
Parent-Child Data Sharing Configuration
This feature is designed for multi-level nested form scenarios. Sub-form query conditions can automatically reference saved field values from the parent form, enabling data linkage and context-aware filtering.
Step 1: Configuration
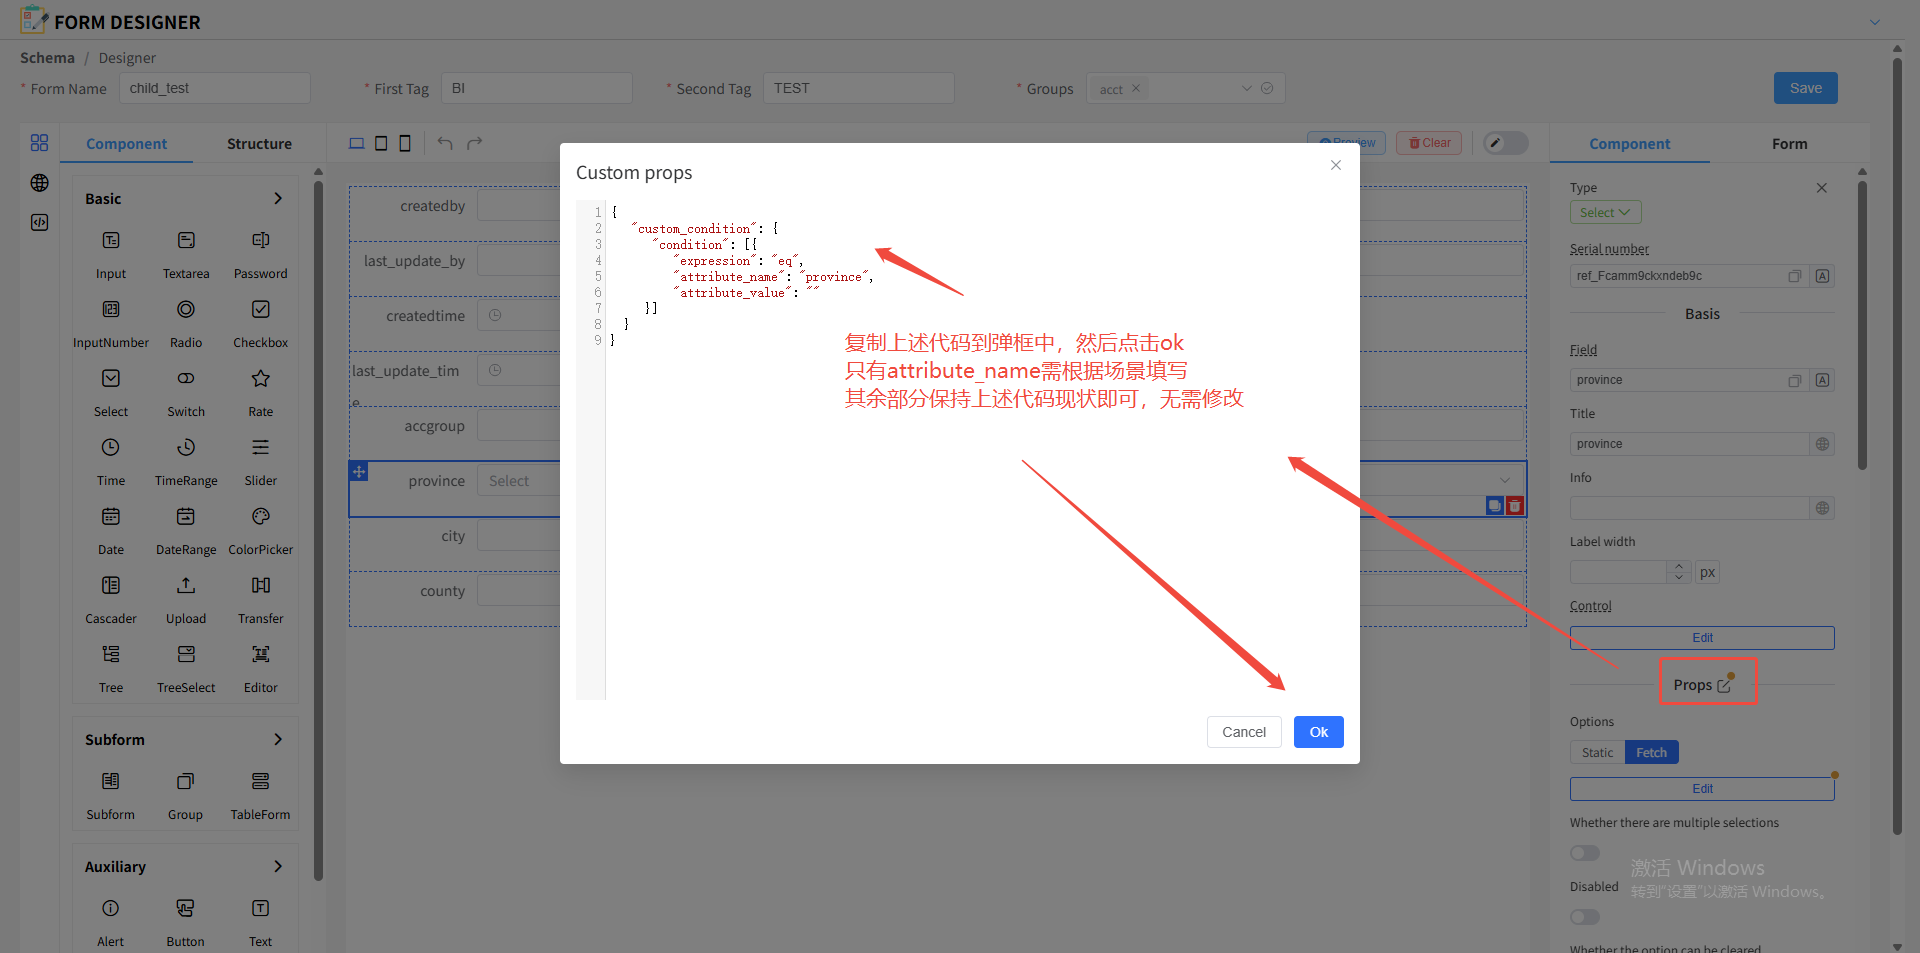
Open the Designer page and select the target sub-form component.
In the right-side properties panel, expand Props and click the Edit icon.
In the JSON configuration window, enter the following:
json"custom_condition": { "condition": [ { "expression": "eq", "attribute_name": "", // Field name for filtering "attribute_value": "" } ] }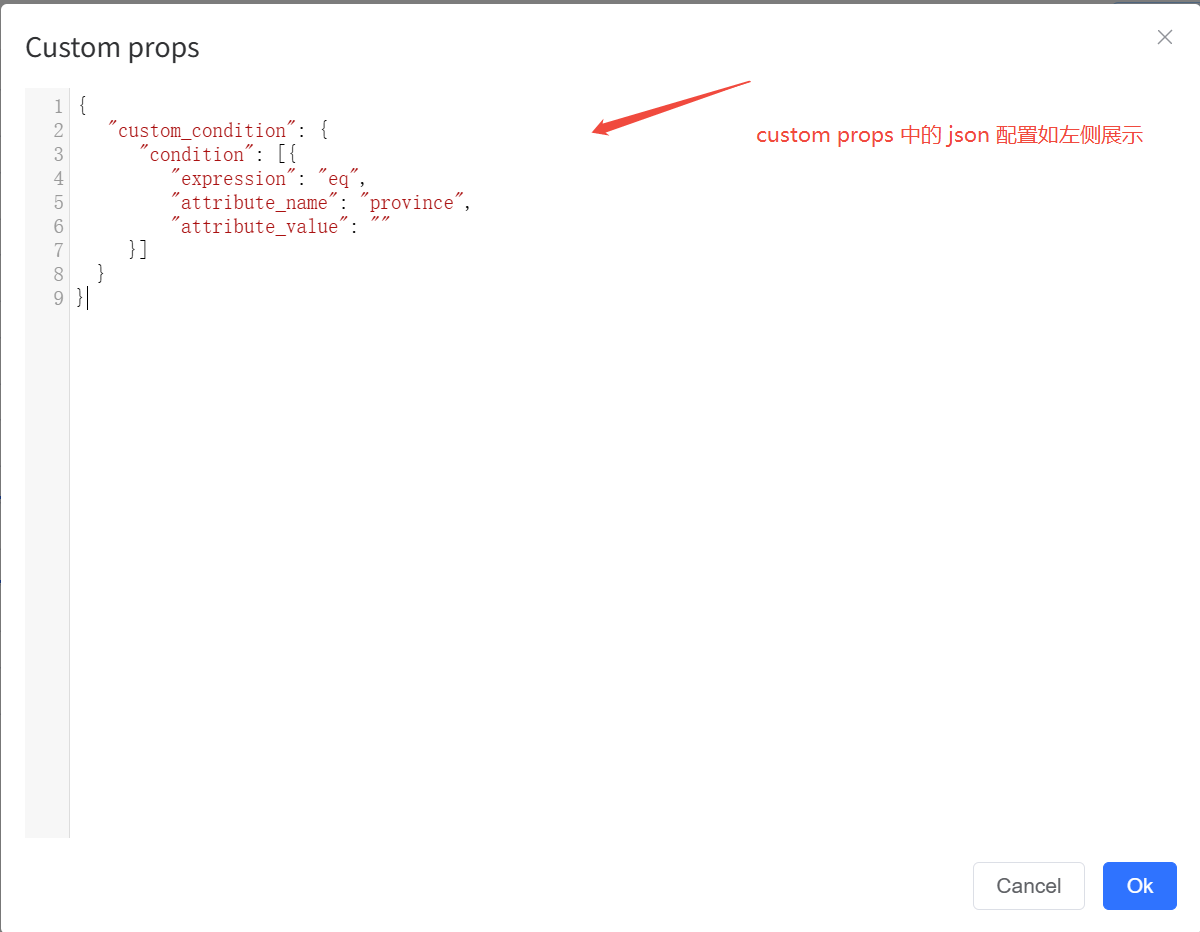
Click Save to confirm the sub-form configuration.
Return to the Designer page and click the top Save button to save the overall form.
Switch to the Data page and ensure the parent form fields have been saved.
Open the sub-form for editing — the system will automatically populate query conditions based on parent form values.
Sub-form Designer example:
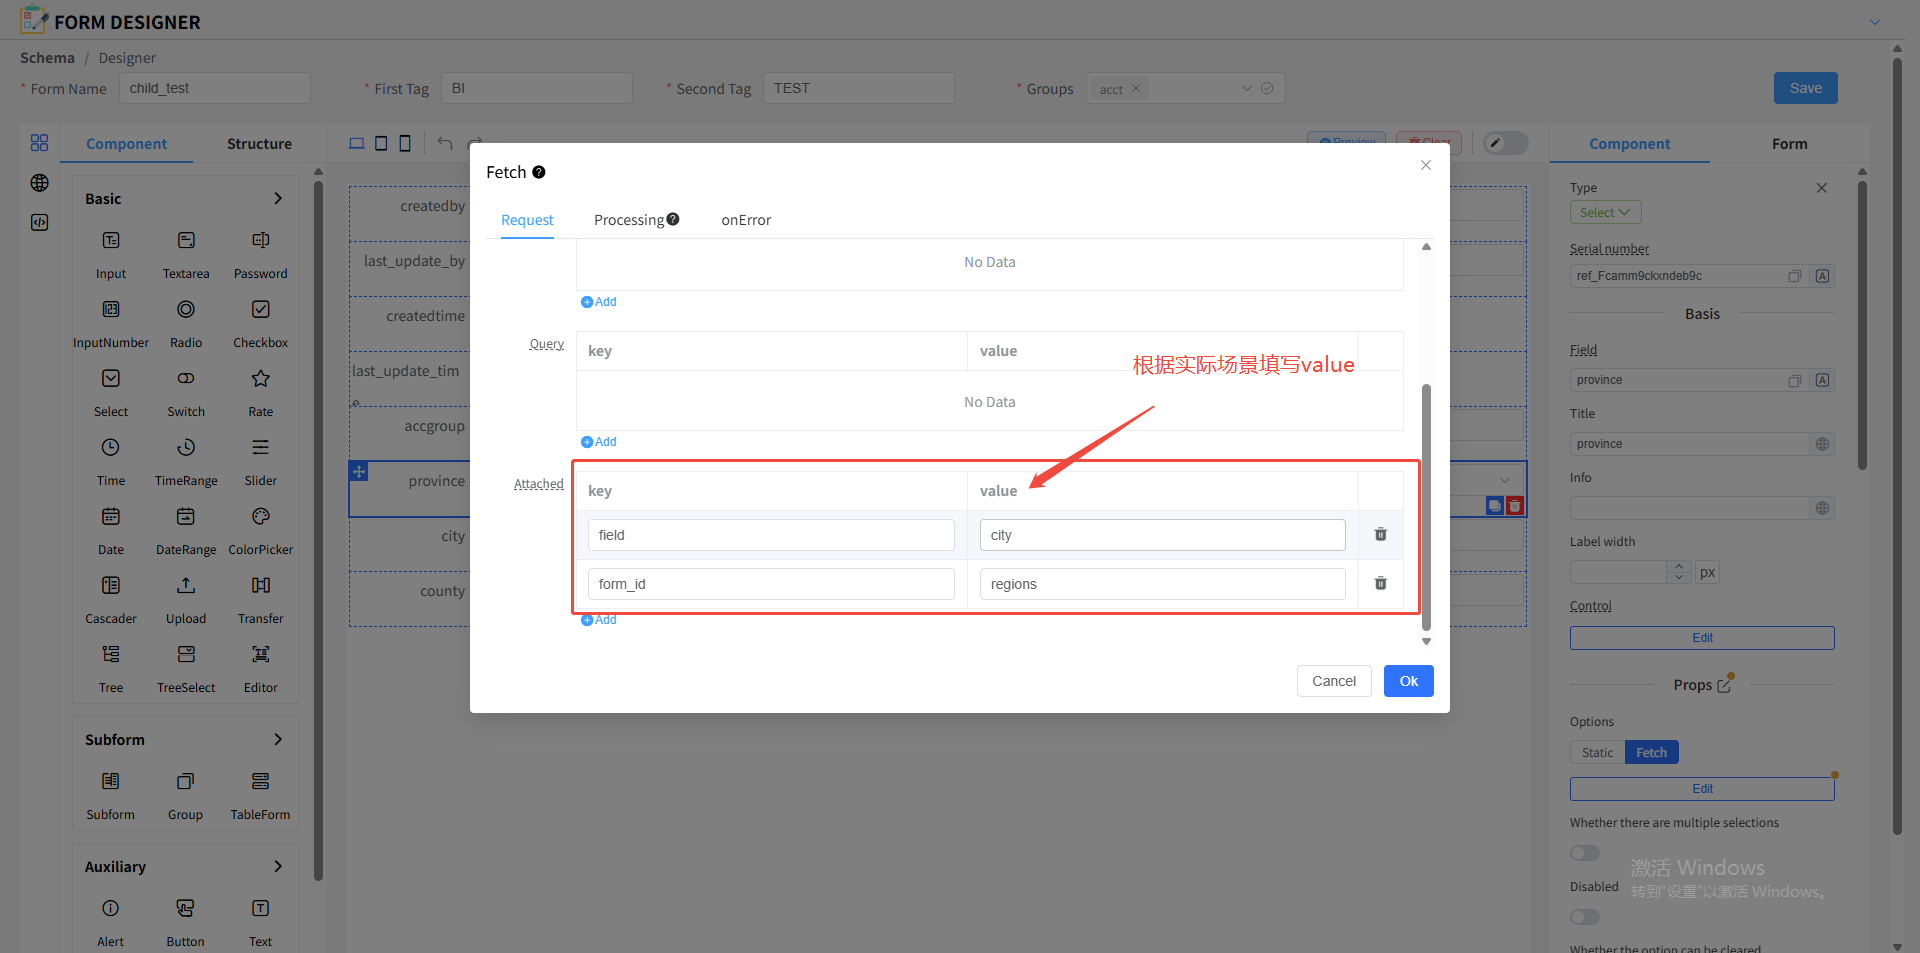
Step 2: Remote API Configuration (fetch)
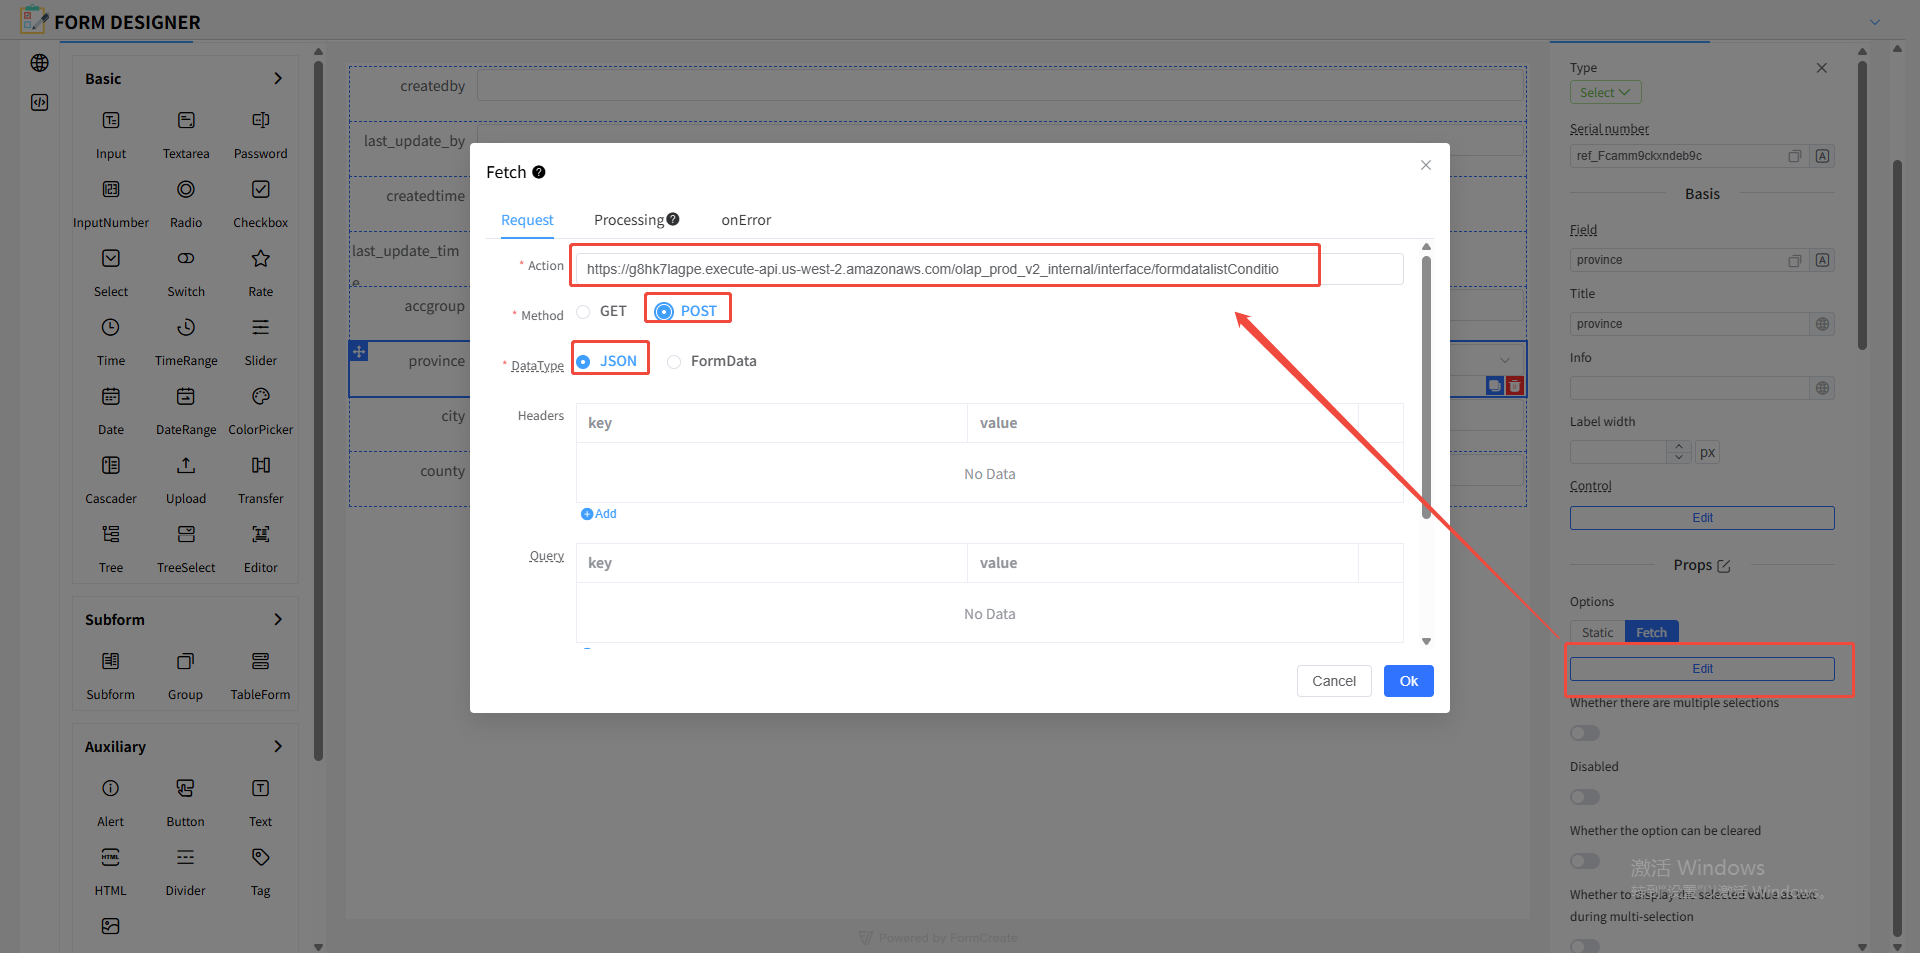
Applicable when any form field needs to retrieve enumeration data from a remote API.
This endpoint is no longer maintained:
https://g8hk7lagpe.execute-api.us-west-2.amazonaws.com/olap_prod_v2_internal/interface/formdatalist
It can be used for global enumeration queries but does not support filtering. For parent-child form sharing, use the endpoint below instead.
Endpoint:https://g8hk7lagpe.execute-api.us-west-2.amazonaws.com/olap_prod_v2_internal/interface/formdatalistCondition
Parameters:
| Parameter | Type | Description |
|---|---|---|
| form_id | string | The database table to query |
| field | string | The parent form field for filtering |
Step 3: Examples
Notes
- This feature only applies to sub-form editing scenarios.
- Parent form fields must be saved and consistent with the database.
- The API request method is POST and cannot be changed to GET.
Result